
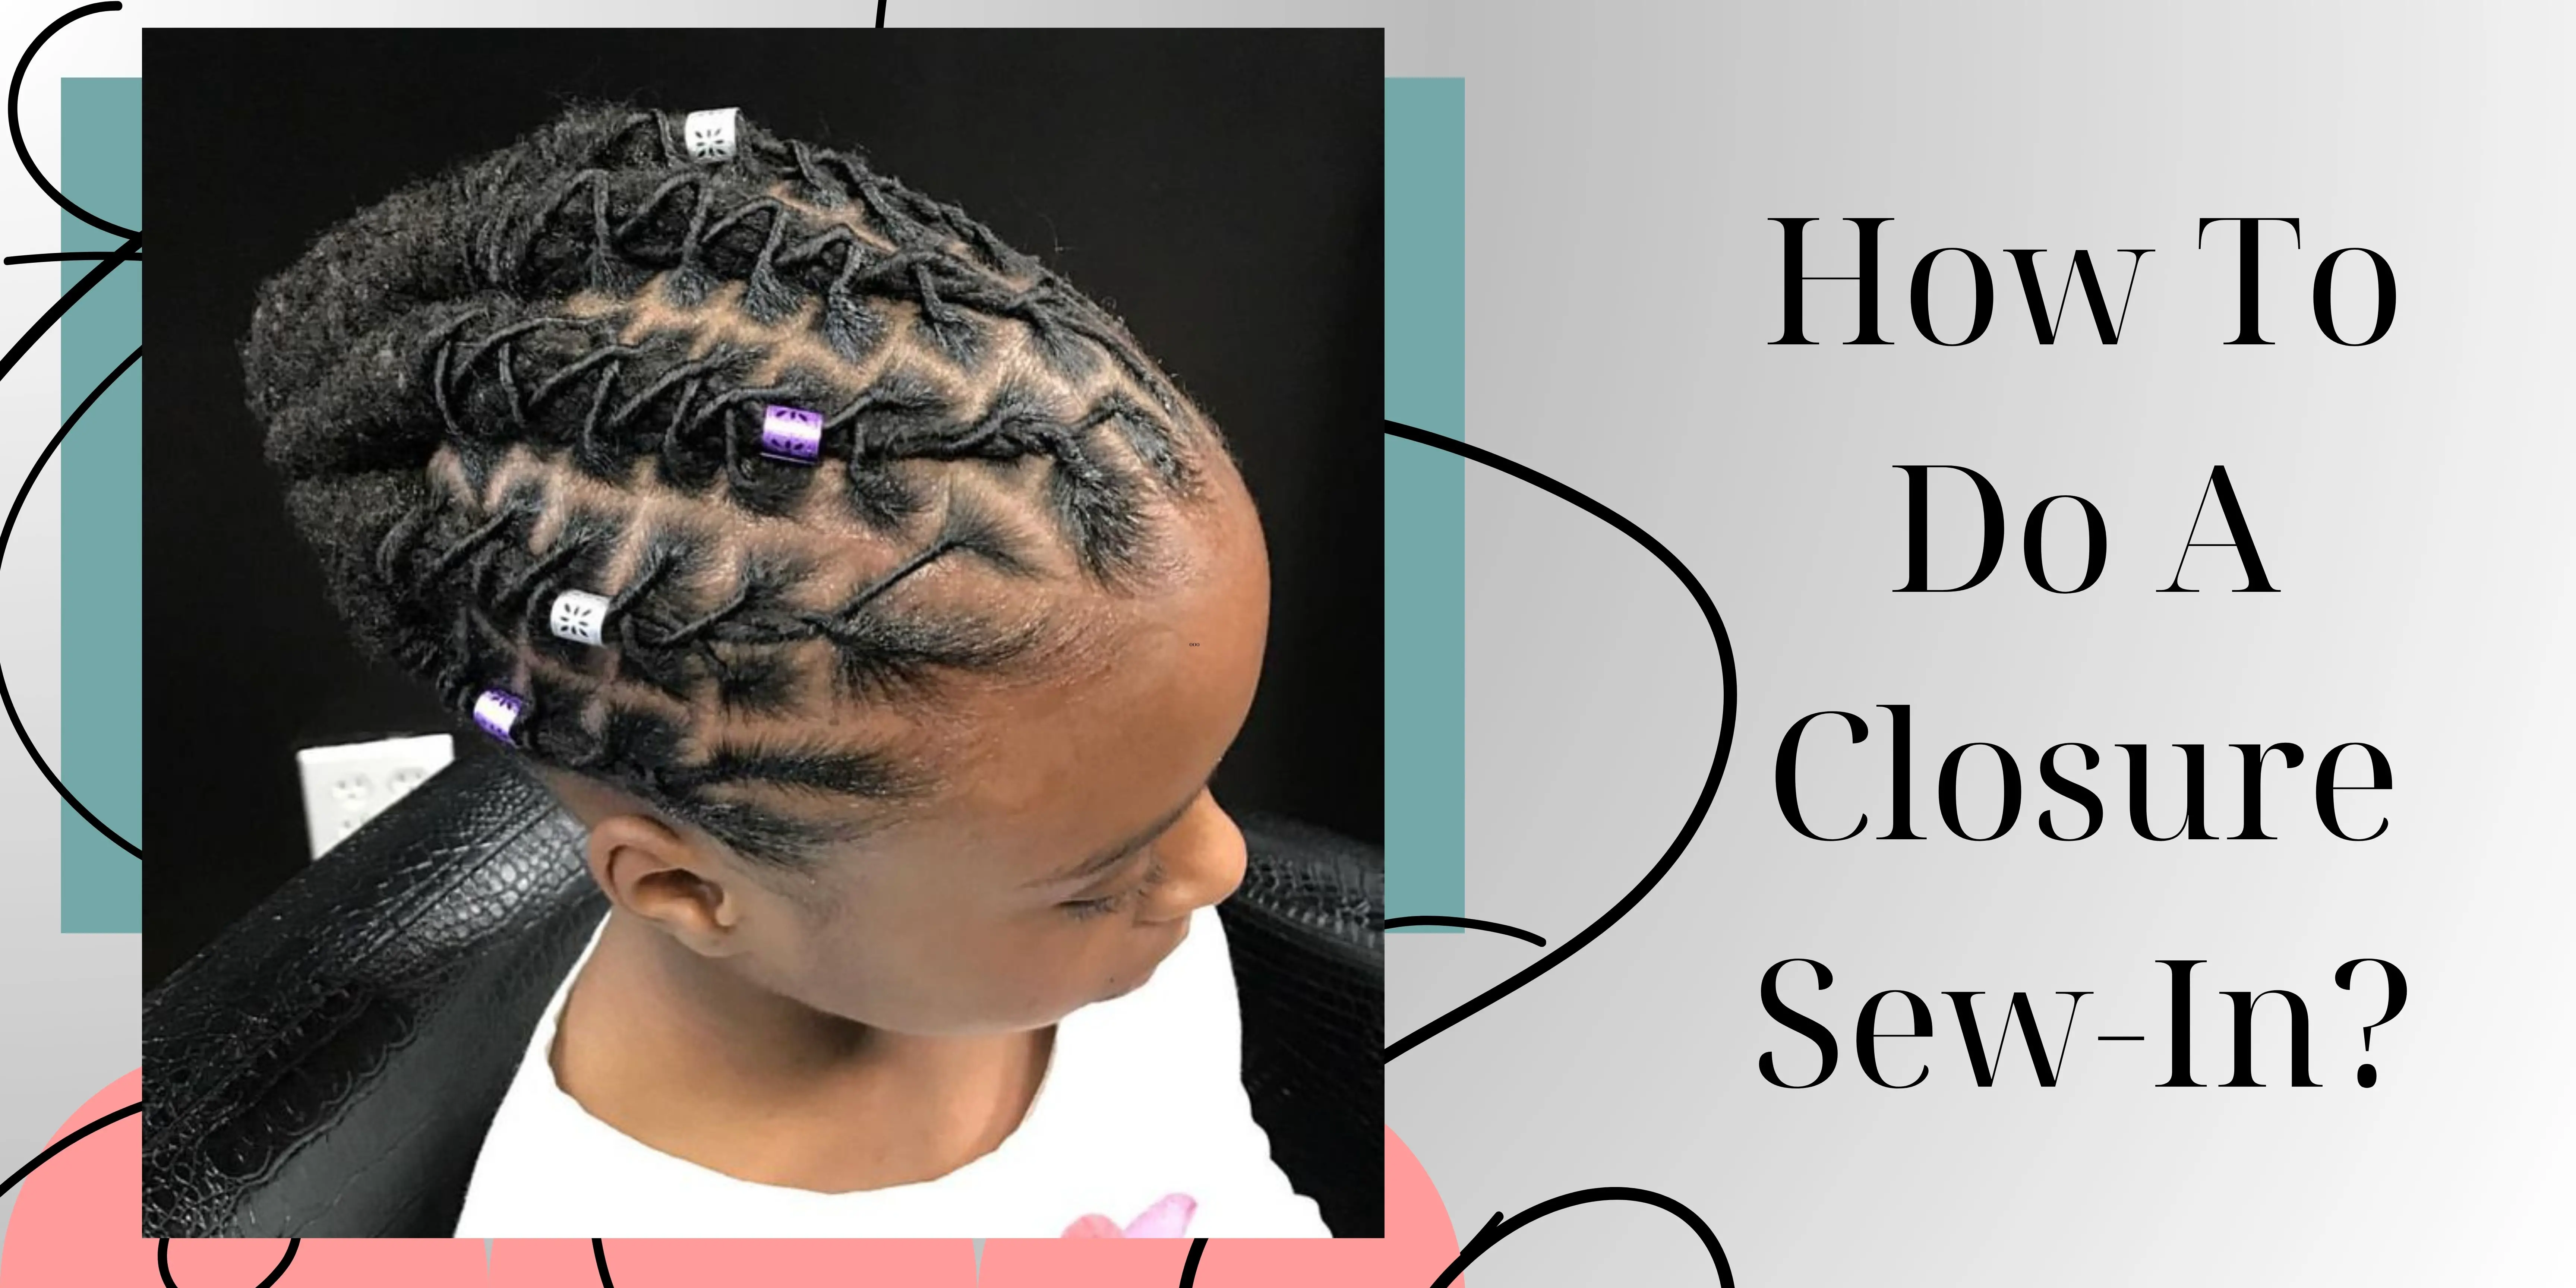
How To Do A Closure Sew-In?
A good hairstyle is the key to a good day, and there are some tips on how to do a closure sew in.
To achieve a flawless lace closure sew-in, follow these essential steps:
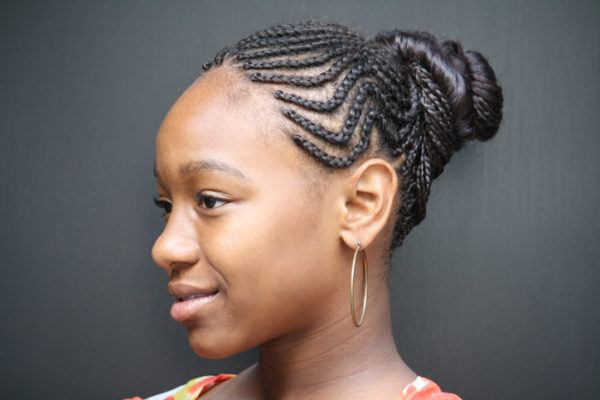
Prepare Your Natural Hair
Start with a thorough cleansing using sulfate-free shampoo and conditioner to maintain a healthy scalp. Begin with a comprehensive cleansing ritual, employing sulfate-free shampoo and conditioner.
This gentle approach minimizes breakage and prepares your natural hair for the subsequent steps in the lace closures sew-in weave process.
Create a Solid Foundation
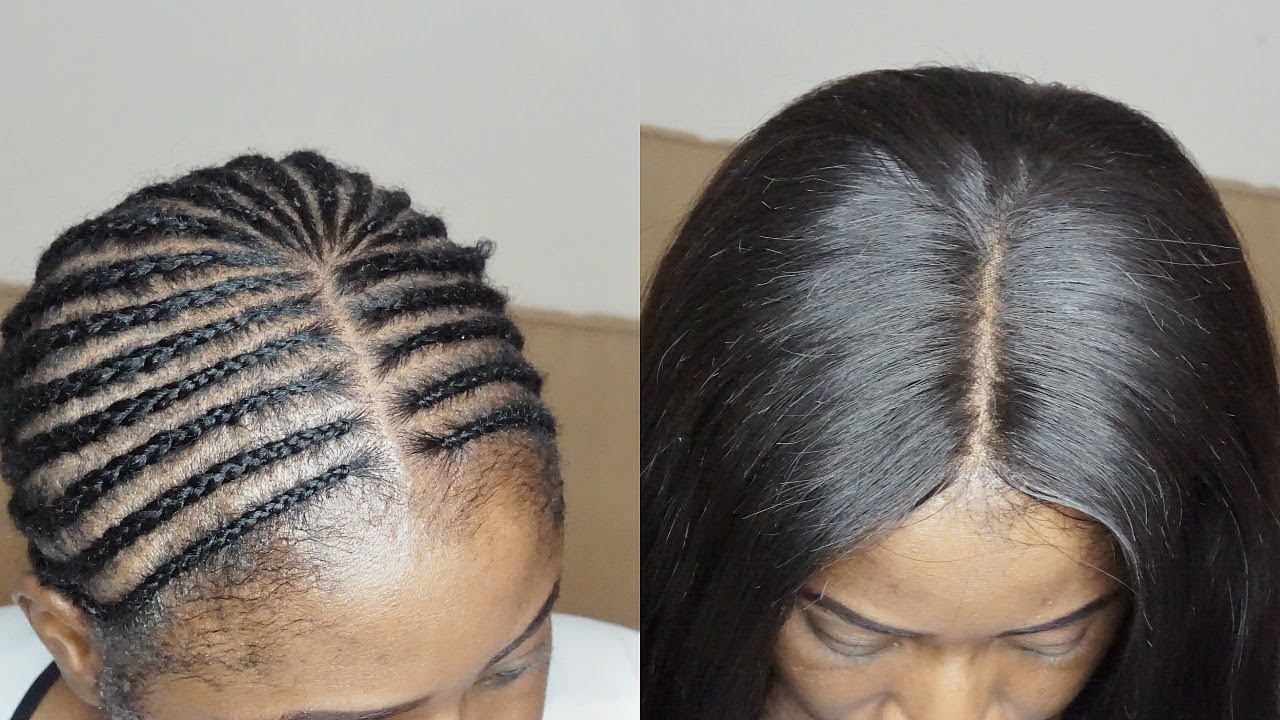
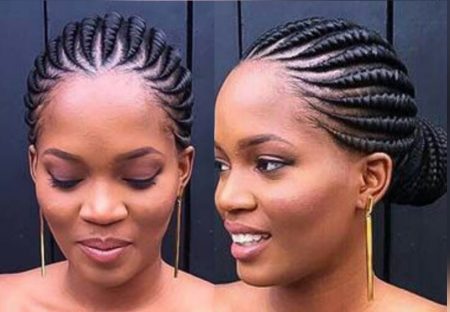
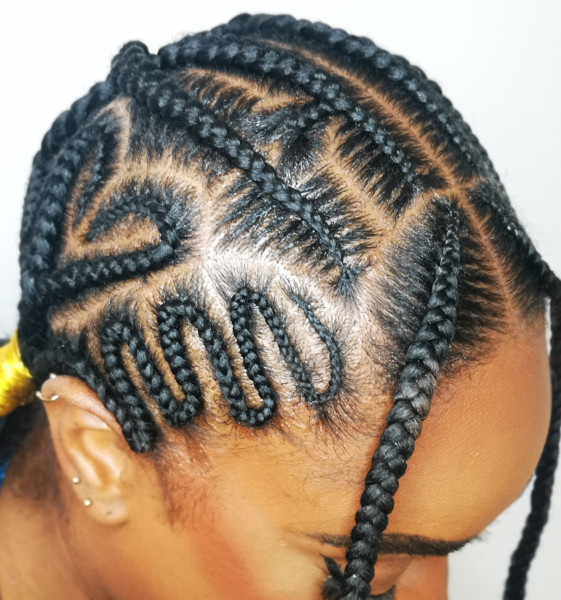
Establish a strong base by braiding your natural hair into a secure pattern, providing a foundation for the lace closure sew-ins. Consider using wig installs to enhance stability.
Commence the process by expertly braiding your real hair into a secure pattern.
This meticulous braids technique lays the groundwork for attaching the lace closure, guaranteeing a flat foundation and effortlessly natural-looking installation.
Elevate the foundation’s stability by incorporating a wig cap into the process. The wig cap acts as an additional layer, enhancing stability and ensuring secure and seamless frontal closures sew-ins.
Choose Your Hair Bundles
When embarking on a lace frontal closure sew-ins, the choice of hair plays a pivotal role in achieving a flawless and natural-looking result.
Before purchasing hair, envision the final look you desire. Determine the length, texture, and color that best complements your own hair and overall style.
This thoughtful consideration ensures that your sew-in closure enhances your natural beauty.
Prioritize High-Quality Human Hair
Opt for human hair closures of the highest quality. Human hair provides a more authentic look compared to synthetic alternatives.
Quality hair ensures longevity, making your closure sew-in weave a worthwhile investment.
Achieve a cohesive appearance by selecting a frontal closure with a texture that closely matches your own. Whether your own hair is straight, wavy, or curly, matching the texture ensures seamless integration.
Blend Seamlessly
Seamlessness is key to a successful closure sew-in. Choose hair closures that effortlessly blend with your synthetic hair.
This includes matching the color tones and ensuring a smooth transition from your purchase human hair to the extensions.
Depending on the desired fullness and volume, consider how many bundles you’ll need. A closure sew-ins typically requires fewer bundles than a full sew-in, but having the right amount ensures a complete and balanced look.
Evaluate Hair Bundles Amount
Assess the quantity of two bundles needed based on your desired thickness and length. A thorough understanding of how many bundles to purchase ensures you have ample hair for a lush.
Thread the Needle
As you delve into the lace closure sew-in process, threading the pin is a crucial step that requires attention to detail. Here’s a guide on how to effectively thread the needle for a seamless and secure sew-in closure installation:
Select the Right Needle
Choose curved or C-curved pins suitable for sewing in hair extensions. Opt for a thread color that complements both your hair and the selected hair bundles.
This ensures that the stitching seamlessly blends in, creating a cohesive appearance. Carefully thread the selected invisible needle with the chosen thread. Ensure that the thread is securely and evenly wound around the pin.
Tie a secure knot at the end of the threaded needle lying. This knot will prevent the thread from slipping through during the sewing process, providing stability as you work through the lace frontal closure installation.
Maintain Consistent Tension
As you sew, maintain consistent tension on the thread. This helps in achieving even and secure stitching. Avoid pulling too tightly, as it may cause unnecessary tension and discomfort on the scalp.
Before proceeding to sew the entire closure, conduct a test stitch on a small section. This allows you to gauge the tension, ensure a comfortable fit, and make any necessary adjustments before the full installation.
Aim for precision in your stitching. Make small, even stitches along the closure’s edge, securing it firmly to the braids’ foundation. Precision contributes to a neat and professional-looking finish.
Begin the Sew-In Process
Commence the sewing process at the back of your head, close to the nape of your neck. Attach the first weft of hair loss, ensuring a basic stitch along the braids pattern.
When it’s time to remove lace frontal adhesives avoid any discomfort or residue. Avoid hard brushing, especially on a lace frontal, to prevent damage and premature wear.
The use of lace frontals has become a widespread method for achieving hairline in various hairstyles, from sew-ins to wigs. This strategic starting point allows for a systematic and organized approach to the sew-ins.
Ensure a secure attachment by employing a basic stitching technique along the established braid pattern. This foundational step lays the groundwork for the entire lace fronts closure sew-in.
Sew in the Lace Closure
Carefully position the lace closure to achieve a seamless blend with your hair. Sew the lace frontal closure along the front hairline, ensuring an undetectable finish that looks natural and flawless.
Carefully position the lace closure to ensure optimal placement that complements your natural hair. Begin sewing the lace frontal closure along the front hairline. Give your hair a much-needed rest between protective styles.
Pay close attention to the direction and pattern of your hair grows as you sew in the closure.
Secure the Closure Sew-In
Continue sewing each weft, placing emphasis on securing the lace frontal closure. Adjust the parting space and direction of the closures to achieve a seamless and flow with your existing hair.
After securing each weft and the lace frontal closure, make final adjustments to the entire sewn-in. After washing your weave or wig, let it air dry to avoid unnecessary heat exposure.
A well-done weave or wig can significantly boost confidence, allowing you to experiment with different styles and looks effortlessly.
Trim any thread from the sewn-in wefts and closures. When using a bonding agent for wigs or weaves, follow the recommended application guidelines to ensure a secure and long-lasting hold. Styling your weave or wig in a parallel format with your hair ensures a cohesive and blended look.
Trim Excess Thread
Trim any excess thread to maintain a neat appearance. Ensure that the extensions are securely attached without causing undue tension on your scalp.
A well-trimmed closure sew-in exudes a professional aesthetic. This contributes to a seamless and natural-looking result. Proper care during protective styles promotes grow healthier natural hair.
It minimizes the risk of tension-related issues, allowing you to daily wear the closure sewn-in confidently without compromising your comfort or well-being.
How To Do A Closure Sew In: Style as Desired
Achieve a sleek and sophisticated look by straightening your closures-sewn hair. Infuse playful curls or voluminous waves into your style for a lively and dynamic appearance.
You can use a curling wand or rollers to create defined curls or loose waves, adding very top movement to your hair.
You can achieve this using a flat iron or by braiding your hair and letting it set before unraveling the braids, resulting in effortless waves. Weaves and wigs are often considered a cost-effective and cheapest option for changing hairstyles without committing to permanent changes or expensive salon visits.

Maintain and Protect Hair Extensions
Implement a consistent maintenance routine for your closures sew-in. Use a silk or satin scarf to protect your hair at night and avoid excessive brushing.
The convenience of wearing wigs or weaves allows for easy style changes and versatility. Additionally, avoid wearing excessively tight styles to minimize stress.
Establish a regular maintenance routine for your closure sew-in. From washing to styling options, handling your hair with care contributes to the longevity of the closure sew-in.
Providing hair with periods of rest between styles helps prevent excessive manipulation and promotes overall hair health.
By following these comprehensive steps, you not only achieve a professionally done closure sew-in but also ensure the longevity and natural allure of your enhanced hairstyle.
