
How To Sew Ruching On A Dress?
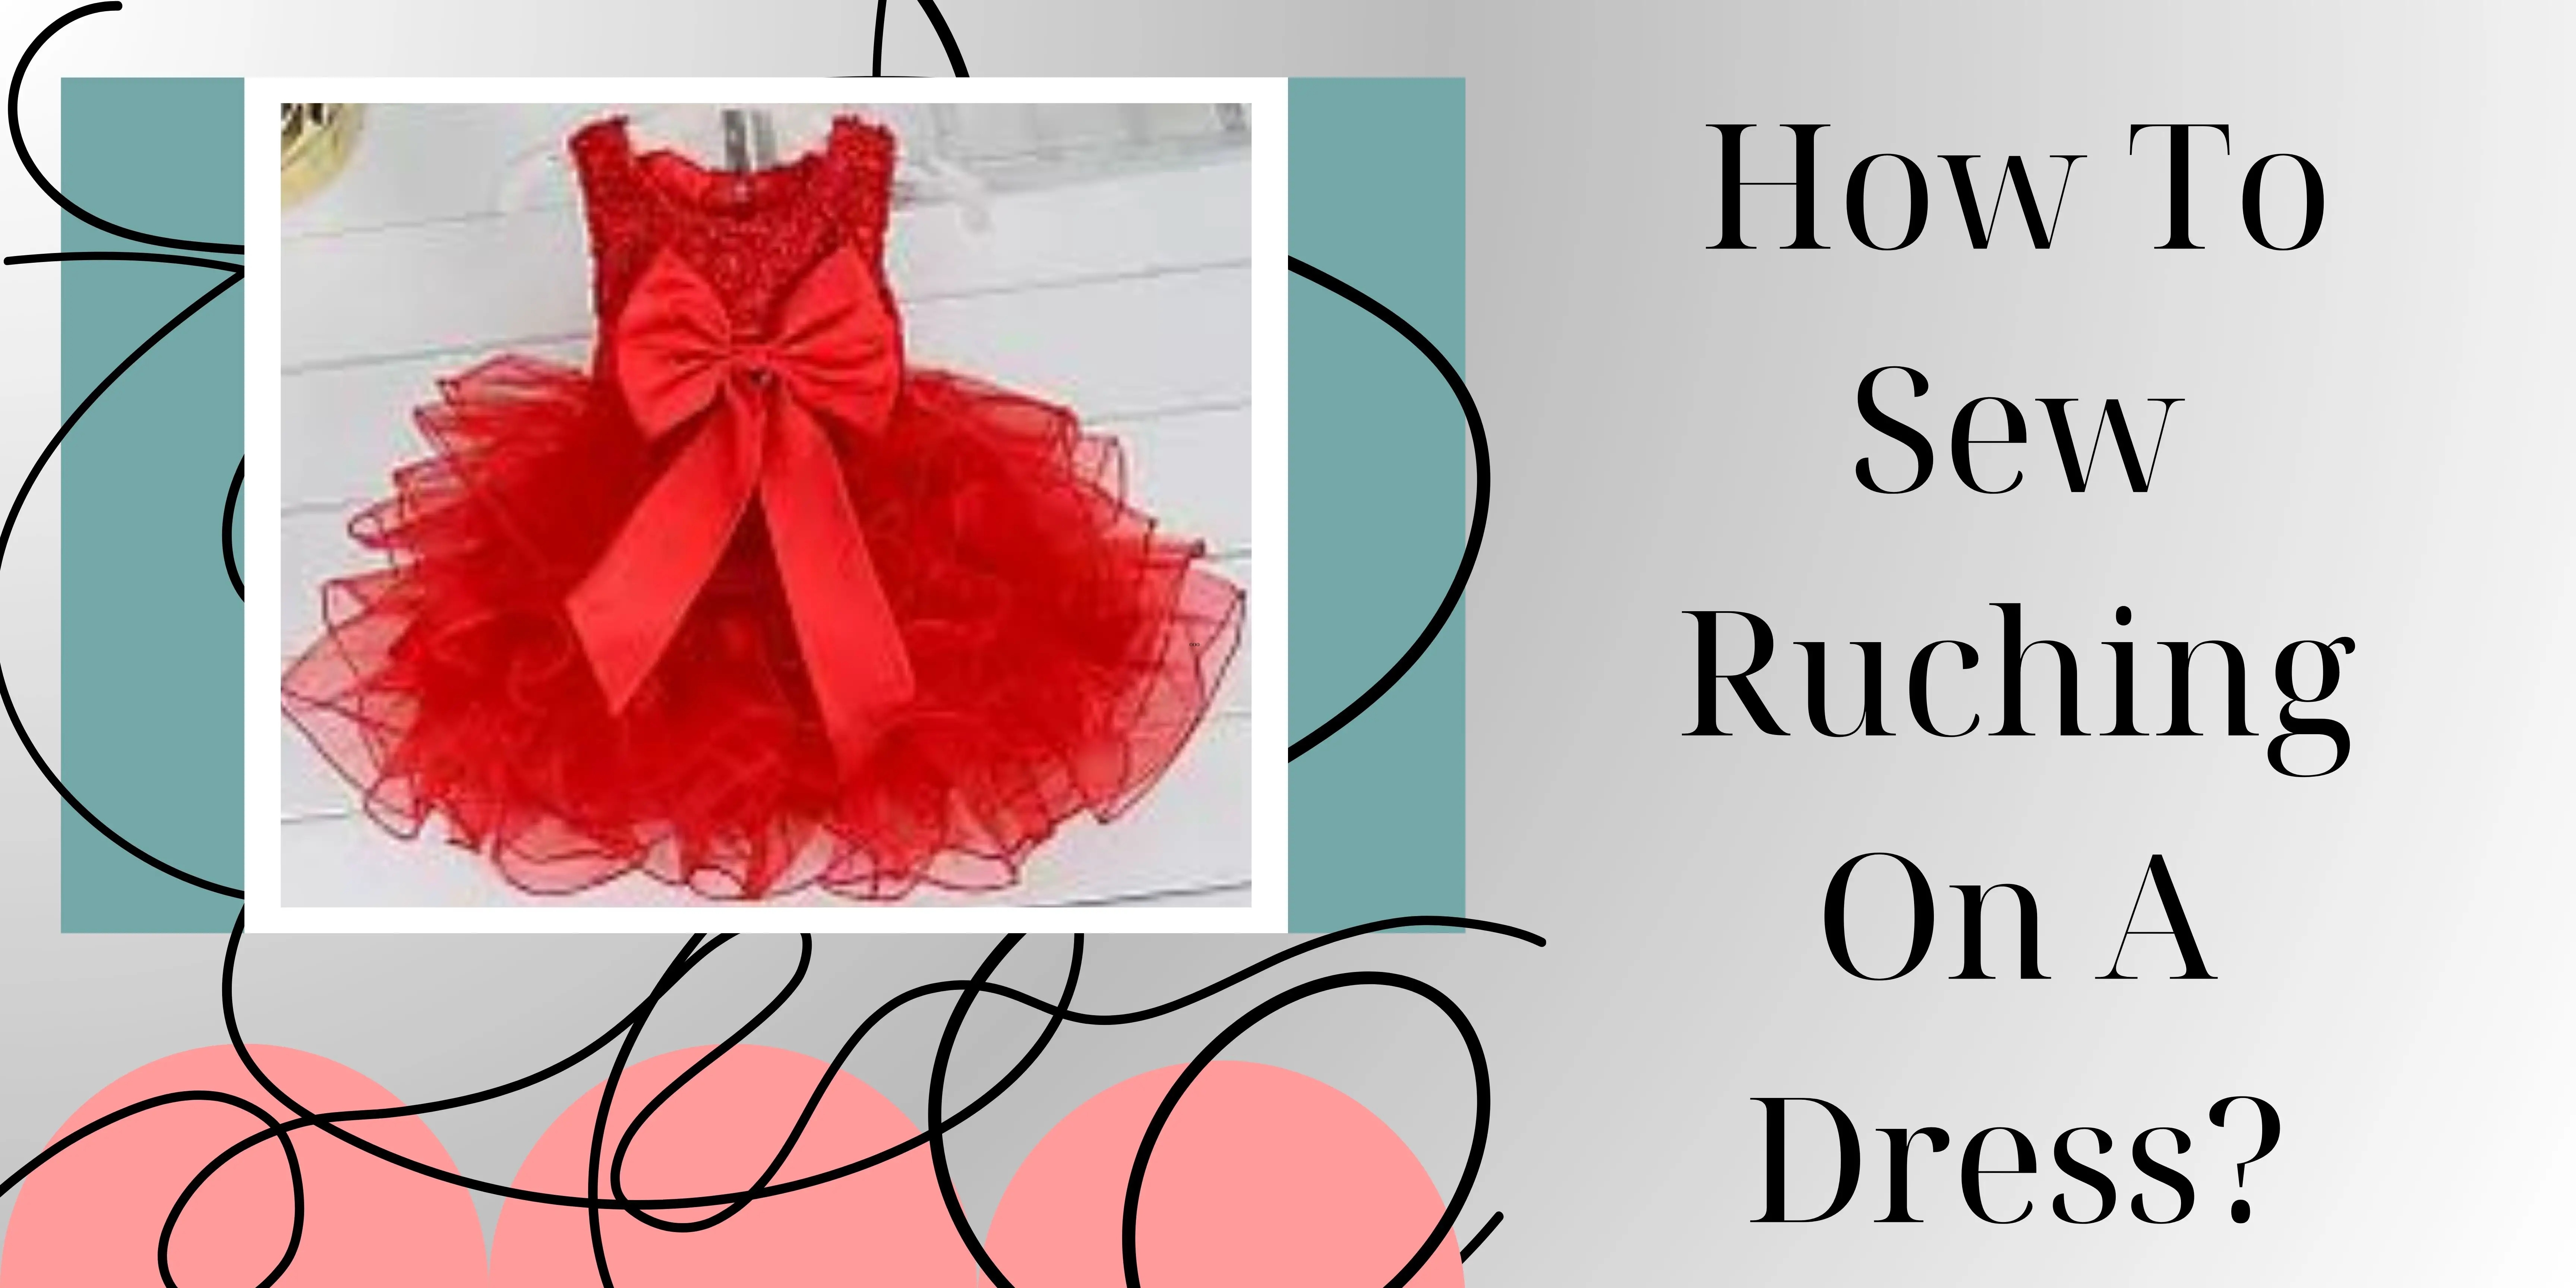
If you want to sew ruching on a cloth can give a unique and beautiful touch to your garment. It is told here how to sew ruching on a dress quickly. Ruching, also known as a ruched effect, is created by gathering elastic fabric together to form pleats or folds. With the help of a sewing machine, this technique can be easily achieved.
Short instruction how to sew ruching on a dress
To start, select your main fabric for the cloth. Ruching works best on lightweight and flowy fabrics. Prepare the elastic fabric by cutting a strip in the desired length for the ruched area.
Next, you’ll need elastic to add elasticity and gather the elastic fabric. Place the elastic along the edge of the elastic fabric strip and begin stitching it using a stitch on your machine. Make sure to stretch the elastic as you sew ruching to create gathering and add volume to the ruffles area.
Continue sewing along the edge of the elastic fabric, adjusting the tension on your machine to create more or less ruching, depending on the desired effect. Pull the fabric gently as you sew to create the desired amount of gathering.
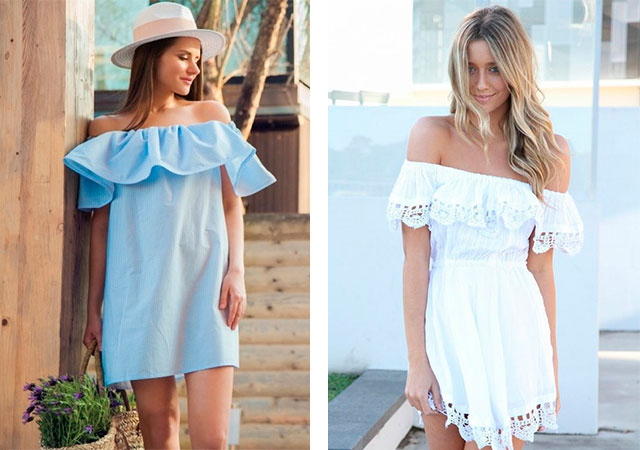
Once you have sewn the ruching effect along the desired area, secure the elastic by backstitching at the beginning and end of the sewing line. The ruching can be added to different parts of the cloth, such as the even as a decorative effect on the skirt. It adds texture and a unique touch to the garment edge.

Types of ruching for a dress
Ruching is a versatile technique used in dressmaking to create texture, visual interest, and a flattering silhouette. Various types of ruching can be achieved using different methods and materials.
Vertical elastic thread ruching and diagonal ruched pull tie
Vertical thread to sew ruching involves ruching fabric with an elastic thread. This special thread creates gathers, allowing the elastic fabric to stretch. This technique is beneficial when working with stretch fabrics like jersey or spandex in creating stylish and comfortable dresses.
Diagonal ruching is a method where fabric is gathered diagonally using an elastic fabric pull tie or elastic strip. Wedding gowns often employ this technique to accentuate the bodice or create interesting design elements.
Sheer fabrics with ruched strip and layered ruche fabric panels
Ruching creates a delicate and elegant effect when applied to sheer fabrics. Using a ruched strip of fabric, designers can add texture to bridal gowns or evening dresses. To sew ruching with a stretch needle ensures that the ruching accommodates the drape of thinner fabrics.
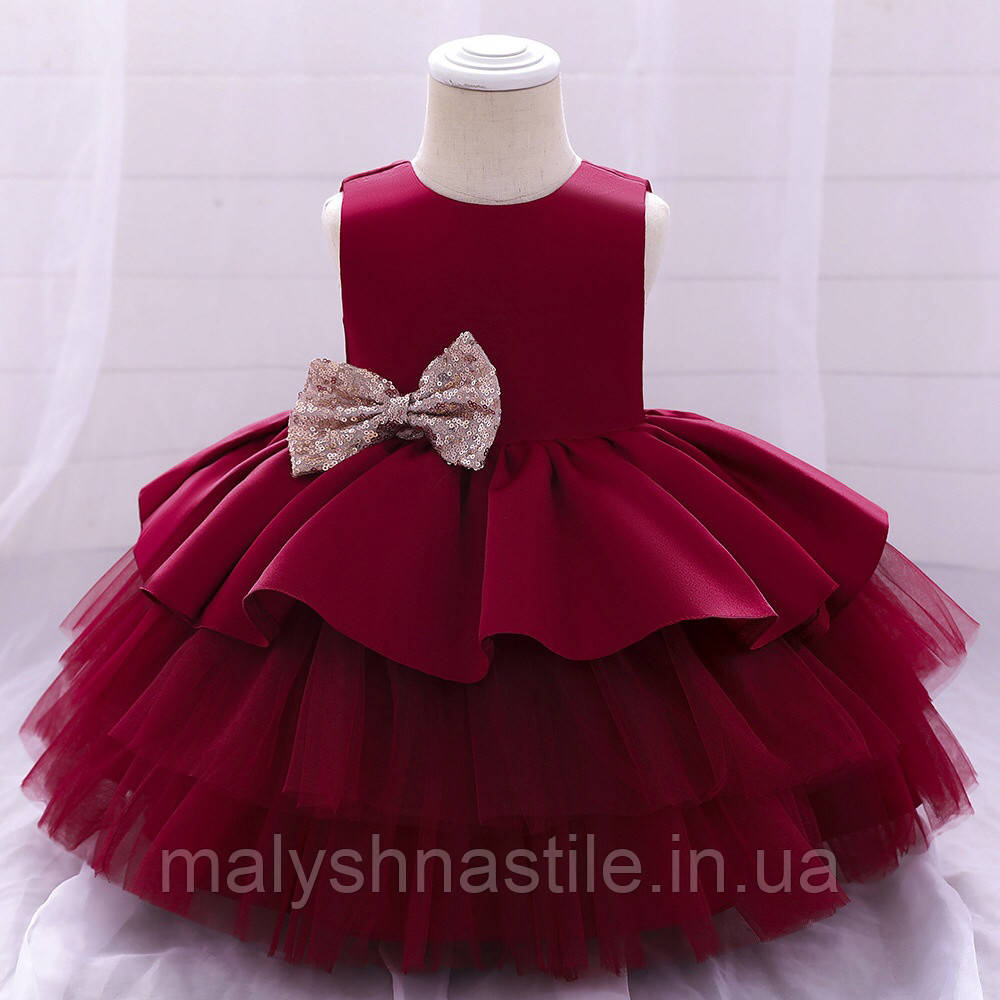
Layered ruche fabric panels involve adding extra fullness by incorporating multiple layers of ruched fabric. This technique is commonly used in bridal gowns to create a voluminous and luxurious appearance.
Asymmetrical ruching with basting stitches
Asymmetrical ruching occurs when the elastic fabric is gathered unevenly. Stitches can be used to temporarily secure the ruched effect before sewing with a straight stitch. This method is popular in creating unique and modern looks.
Ruched effect with excess fabric
Ruching creates a beautiful effect by manipulating excess fabric. By strategically placing stitches and adjusting the elastic fabric, designers can control the amount of ruching to achieve the desired style.
Ruffles waistband in stretch fabric
Stretch fabric is ideal for creating a waistband. Using a stretch needle ensures that the elasticity of the elastic fabric is maintained, providing both comfort and style. This technique is often employed in casual dresses for a fashionable yet relaxed look.
The ruched pattern piece for extra fabric
When designing a cloth, a ruffle pattern piece can be incorporated to add extra fabric and create a unique design element. This is commonly seen in high-fashion dresses where ruching is used strategically to enhance the overall aesthetic.
Finished ruching on the wrong side
The finished ruching is not only about the right side of the elastic fabric; attention to the wrong side is crucial for a polished look.
By neatly securing basting stitches and using a normal thread, the side of the ruched fabric maintains a clean and professional appearance.
Ruching with its ability to add flair and dimension, offers a myriad of creative possibilities in skirt design. Whether applied to wedding gowns or casual dresses, understanding different ruching techniques allows designers to craft garments that are both stylish and comfortable.
Methods to sew a ruching to a dress
Here’s a guide on methods to sew ruching to cloth using the provided words:
Basic ruching with a fabric pull-tie and ruching using pleats
To add ruching to a cloth, begin by determining the length of the ruffle area. Cut a strip of fabric for the ruffles effect, ensuring it is longer than the area to be ruched. Using a safety pin, thread a fabric through the strip.
Sew along the pleats with a straight stitch, securing the ruching while adding an intricate detail to the garment.
Securing ruching with a few stitches
Pin the strip along the raw edges of the main fabric, starting at the top edge and working your way down. Sew a few stitches along the strip to secure it temporarily in place. This helps maintain the positioning while sewing the final stitches.
Creating pleats with a zig-zag stitch
For a decorative effect, consider using a zig-zag stitch on the sewing machine. This not only adds detail to the ruching area but also helps secure the elastic fabric in place. Stitch along the strip of fabric, creating zig-zag pleats for a unique and textured look.
Adding ruching to the bodice or bust line and the garment top edge
When you add ruching to the bodice or bust line, start by pinning the ruffles strip in place. Sew a stitch to permanently secure the ruching. This method adds extra fullness and creates a flattering silhouette around the bust.
For a unique detail, consider adding ruching to the edge of the garment. Safety pin the ruffles strip along the edge and sew using a stitch. This method adds an interesting feature to the neckline or hem.
Ruched sleeves for decorative purposes
To add volume to sleeves for decorative purposes, pin the strip along the desired length of the sleeve. Sew a stitch to secure the strip, ensuring it complements the overall design of the garment.

Ruching fabric with a closed-end garment edger
For a neat finish, use a garment edger to enclose the raw edges of the strip. This method ensures a polished look and prevents fraying.
Creating full-length ruching with elastic
If aiming for a full-length ruching effect, sew a strip of elastic along the length of the fabric. This method is especially effective for adding volume to the entire clothing.
Finishing ruching with a pull
After securing the ruching strip in place, gently pull the fabric to adjust the gathers to the desired fullness. Ensure that more ruching occurs evenly along the entire length, creating a balanced and visually appealing effect.
Remember to experiment with these methods to find the ruching style to sew ruching that best complements the overall design and aesthetic of the cloth.
How to avoid mistakes when sewing a ruffle to a cloth?
When you sew ruching to a cloth, follow these steps to avoid mistakes:
- Start by preparing the ruching and the cloth. Ensure that you have identified the right side and the other side of both the ruching and the cloth fabric. The right side refers to the side that will be visible on the finished garment, while the other side is the inner or less visible side.
- Position the ruching on the cloth, aligning the edges properly. Depending on the design, you may attach the ruching to the neckline, hemline, or any other desired location on the garment.
- If the ruffle is pleated, make sure that the folds are evenly distributed and aligned with the rest of the garment. This will help create an aesthetically pleasing look.
- Fix the ruffle to the garment, placing the pins perpendicular to the fabric along the length of the ruching. This will prevent the ruffle from shifting while sewing.
- Some ruchings may require you to sew the closed end first, while others may require you to start sewing from the open end. Refer to the pattern or instructions for guidance.
- As you sew ruching, use slight tension on the thread and continuously pull the fabric behind the presser foot to avoid creating folds or puckers. This will ensure a smooth and even attachment of the ruching.
- It is important to maintain an even length of seams while sewing. This will ensure that the ruching is securely attached to the garment’s edge.
- Once the ruffle is attached, examine the garment edge to ensure that there are no loose threads or unfinished areas. Trim any fabric or threads as needed.
Remember, practice makes perfect, so don’t be discouraged if your first attempt doesn’t turn out as expected. With time and experience, you will become more skilled at sewing ruffles onto garments.

Conclusion
In conclusion, when you sew ruching to an elastic cloth, it is important to consider the type of clothing and the desired effect. If the ruching is pleated, ensure that the pleating is done in the same way as the rest of the garment for uniformity.
Using elastic in the ruffle construction helps create a gathered and ruched effect, adding texture and dimension to the cloth. The elastic should be sewn in a way that allows for the desired amount of gathering, pleating, or adding ruching.
Worth paying attention
When you sew ruching from elastic, it is crucial to maintain an even tension on the thread to ensure that the ruffles are securely attached to the cloth.
Careful attention should be given to the pleating and pleating placement, as this will determine the final look of the ruched area.
Overall, when you sew ruching involves attaching the elastic ruffle to the cloth, following the same principles of pleating and sewing ruching as described earlier in the steps. With practice and attention to detail, as well as this brief instruction how to sew ruching on a dress you will be able to achieve beautiful and professionally sewn elastic ruffles on your clothes.
