
How to Sew a Cuff on Pants? – Easiest Ways to Do It
You are wondering how to upgrade your clothes in order to follow fashion trends in 2022? Or, perhaps, you covet to insert an eye-catching detail into your look. You may also want to add some length to a pair of jeans or pants that are excessively short. Merely add a little excess fabric to the cuff and fold it. In addition, you can hem and cut pants that already possess a cuff. Be sure, this is done pretty easily. So, let`s speak about how to Sew a Cuff on Pants.
All of these wishes you can put into action by reading through this post published on our website. Here you can uncover a sewing tutorial that will give you a reply on how to turn any old jeans into your own one-of-a-kind product.
For your convenience utilize the menu, where all are divided into categories.
So, let`s get started!
How to Sew a Cuff on a Pant Leg by Using Your Sewing Machine?
This tutorial will give you a reply on how to give a new coupled with a trendy look to your original pants. You can also read through the comments or leave your own comment and get a reply if you do not understand something or solely covet to find like-minded people. Here we go!
But whether you sew a patch on hat or cuff on a pant you’ll need some equipment.
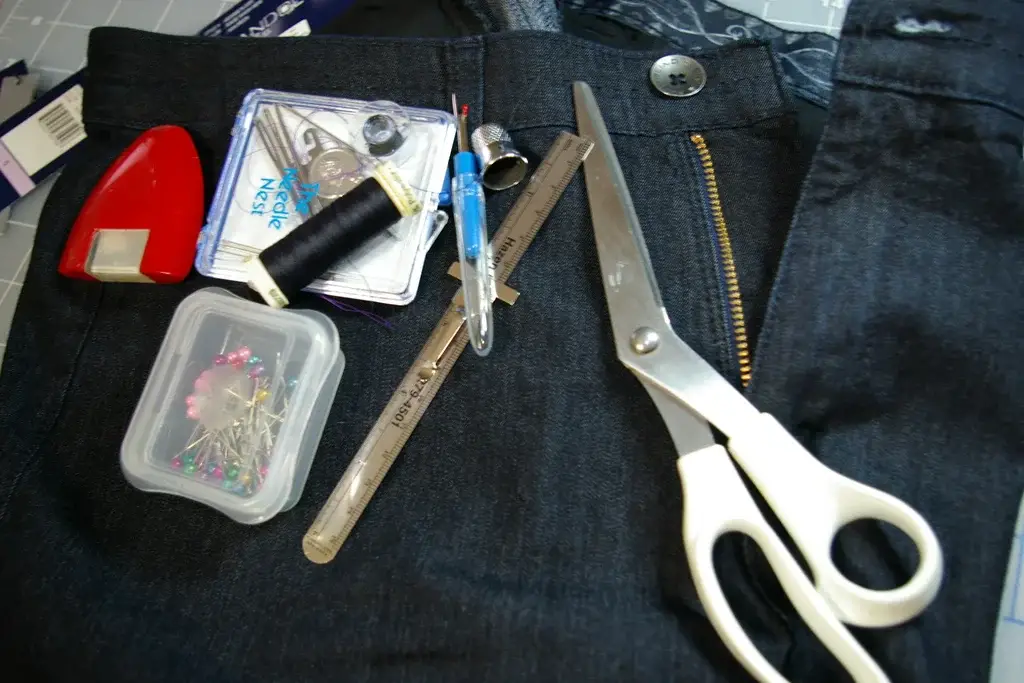
To begin with, prepare some additional tools in advance:
- pants that you want to improve;
- a little fabric that you like;
- needle;
- ruler;
- thread (that is suitable in color for your pants and cuff);
- tailors pins;
- scissors (that are sharp enough);
- sewing machine.
After you have prepared everything, we can move on.
- Take the completed pants or if you are sewing them you should pause until we will hem the bottom.
- Snip a couple of pieces of the fabric in the shape of rectangles (they should be double the width of the hem adding one-half inches for seams).
- The holes for the legs are around four inches, therefore you should append one-half inches.
- The altitude will be double than the desirable cuff height, adding one-half inches.
- Note: If you desire to make the pants longer using the cuffs you will need to append more fabric.
- Fold the fabric in half. The edges should be touching as well as the right side should touch another side.
- Stitch lengthwise the edges leaving a little space for stitches. As a result, you must get a tubule as in the image below.
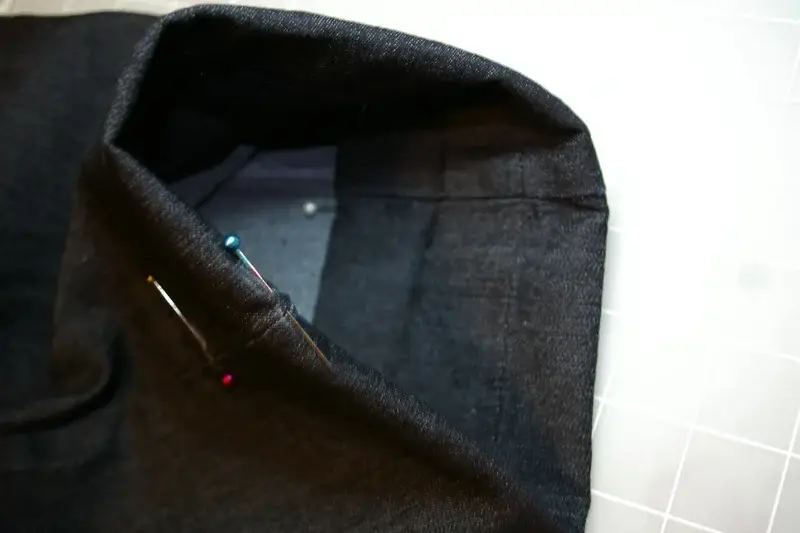
- Fold the upper part of the tube downwards in this manner: the right part of the fabric is pointing from within as well as the outside part of your tubule and pin down.
- Note: If you desire to be convinced the print is meeting with the right path and the bent portion of the tubule is overhead and the end is below.
- Then put the cuff into the trouser leg.
- Line the lateral stitch of the cuff with the internal stitch. The front part must meet the reverse of the trousers.
- Line the bed of the cuff along with the bed of the leg. Then fix everything with the aid of tailors pins to keep it from moving.
- Stitch the cuff to the trouser leg leaving a tiny space for the seams (around one-quarter inches).
- Then, turn off the trousers and fold them upwards.
- The last step is to press and this is it.
How to Make Pants with a Cuff Shorter?
Perhaps, every person faced such problems when he was mistaken for the size of pants or jeans. You could solely order them online without trying them on (it is rather complicated to guess the right size without it) or just purchase them because you really liked them. It is genuinely inconvenient to wear this pair and that`s why they are usually pushed to the back-burner.
Nonetheless, you did not want to throw them away along with paying a lot of money to the tailor`s shop as their service can be rather costly. Therefore, you decided to make everything yourself. Then, you were in search of the necessary information as well as people’s comments all around the web and found out this tutorial on our website.
Do not worry, you merely need to follow the tutorial step by step using the menu and everything will work out.
Firstly, let`s figure out what exactly you need:
- pants that are excessively long;
- special tailor’s chalk (in order to mark the intended length);
- tailors pins (to fix the fabric);
- sharp scissors;
- seam ripper;
- tape measure or ruler (to line the proper size);
- iron board;
- clothing iron;
- thread (that is suitable in color for your pants);
- sewing machine (or you can exploit a standard needle and thread instead).
And if you are good at sewing or do not have a sewing machine, you can do everything manually. It will not affect the outcome in any way.
Stage 1. Mark the Length
- To begin with, try on a pair of pants and mark the new suitable length of the pant legs with the help of tailors pins or chalk.
- Pay attention to the right pant leg in the image. It is the most crucial mark on the pants since it is the finished length.
Be careful, you might accidentally hem your pants too short!
Stage 2. Measure the Width
Gauge the width of the initial hem as shown in the picture below.
Stage 3. Put Away the Seams that Keep the Cuff in Place
- The cuffs can possess some stitches on the top of the side seams. Cut the stitches using a seam ripper.
- Take away the stitch by stitch of the original hem.
- Fold the cuff as shown in the image.
Stage 4. Measure the Length
Measure the distance from the end to the bottom of the cuff (this piece of cloth is required to reconstruct a similar one on the finished pants).
Stage 5. Mark the Length
- Then, uncover the intended mark on the original hem and affix the distance you merely gauged from the hem to the bottom of the cloth.
- In the image at the top, you can find a new mark to cut.
However, at first, you should mark the length of the folded cuffs and then cut the cloth.
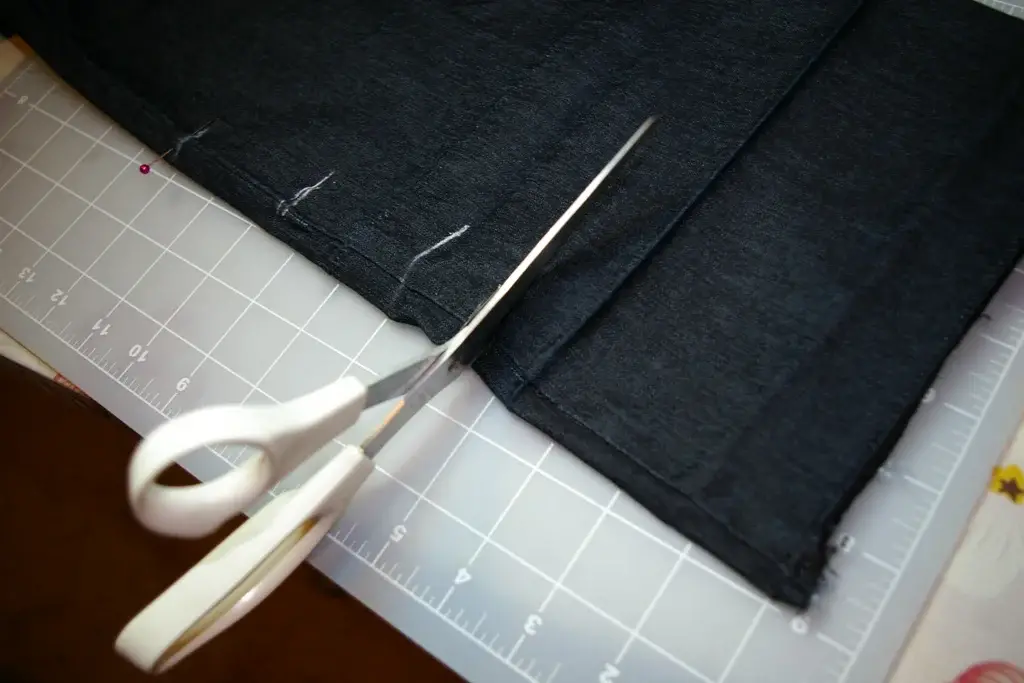
Stage 6. Cut Off the Excess Cloth
Firstly, you should cut off the excess fabric by the markings on the folded cuffs in the following way:
- Make a tiny cut across one side and the other side of the cloth.
- Put only one razor of the scissors into the cutout in order to cut a purely single coat in one go (use a tape measure and pins to do it uniformly along with directly).
- At first, do this procedure on one pant leg and then on the other.
For your convenience, you can utilize the first finished pant leg as a pattern for the second one.
Stage 7. Press the Edge
Press the cut-off raw edge of a similar size that was used on the pants until you cut it off.
Stage 8. Fold the Pant Legs
When you are done with the previous stage, fold the pant legs to the top of the cuff line.
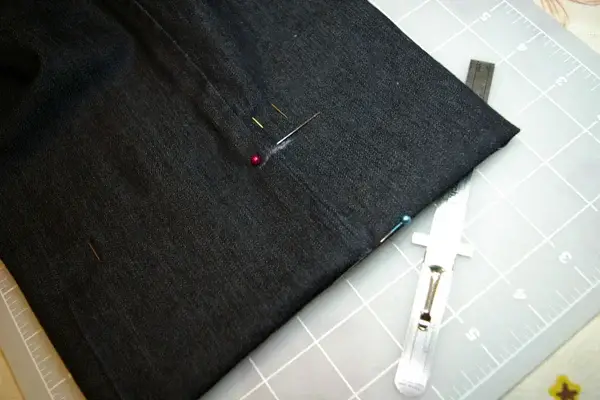
Stage 9. Press the Pant Leg
- Press the pant leg lengthwise at the top of the cuff line.
- Then exploit tailors pins in order to keep the fold of the cuff in place.
- Make a marking on the folding line on the other pant leg with the aid of the edge of the initial pant leg.
- Fold another pant leg, then press it and tack.
In case you are exploiting your stitching machine, sew lengthwise the edge in a place where the new edge is folded (on the inside of the leg).
In case you are stitching manually, sew the rotated edge to the cloth in a place where you have been fixed. Sew the hemstitch first on one pant leg and then to the other.
Stage 10. Tuck the Cuff
- Turn the cuff up to the desired length of the hem just like in the illustration;
- Then fold it at the new marking and put pressure;
- Attach its upper part by “seaming in the seam”.
It means needlework on the lower aspect of the stitch or where there is not any seam allowance fabric beneath the block element. It can be also named “stitch in the ditch”.
In this case, it implies sewing some seams lengthwise on the upper end of the cuff right on top of the stitches in the leg.
Pay attention, that in case of utilizing the suitable in a color thread it cannot be seen.
Stage 11. Ready-made cuff and its Appearance from Inside Along With Outside
Here in the picture, you can observe the finished cuffs.
On the right side, you see the appearance from the inside and on the other is the view from the outside.
In the image below you can view the cuffs of their pants after pressing. The little bit of cloth at the bottom of the image is the piece that was removed (with the help of this bit of fabric it is easy to mend your pants in case of tearing as the color is suitable, so it is best to keep it).
Additionally, you can observe a seam line through the upper side of the hem. It is the stitches marking from the original hem.
Be sure that these markings on the pants will not be visible after laundering.
That`s about it! Only eleven posts and you will obtain the new pair of cuffed pants that are up-to-date in 2022 and you will definitely like them.
How to Sew an Elastic Cuff on Pants?
To sew an elastic cuff on your trousers is as simple as a usual one, you merely need to use an English pin to operate it. The process is easier than sewing nylon fabric. Let’s get the process
- Firstly, bend the hemline of the trousers in two. In order to create an edging for the rubber band, you need to sew the trousers so that the elastic could possess some space to go across. Moreover, take into account that the folded area is rather broad to the rubber band.
- Secondly, sew the ends of the hemline lengthwise. Remain a tiny spacing in the hole so that you are able to put the rubber band into it when everything will be finished. In case you are putting the elastic into the trousers that possess a rather broad hem to put the band into, you might have to make a tiny cut within the hemline. In order to do this use your snipping tool.
- Thirdly, affix the edge of the elastic band using English pins. This way it will be more ready to operate. Take notice that you affixed the pins at a great distance from the edge of the rubber band as it can slide out.
- Then, put the locked English pin into the hole in the leg hemline. Work for the band across the hemline with the aid of the pin to go it lengthwise. You should operate gradually and carefully.
- Afterward, remove the pin and sew the edges of the rubber band together and cover the spacing. Then, sew the hole (you put the elastic band) manually or with the aim of the stitching machine.
- Eventually, do the same procedure with the remaining pant leg.
Here you have your convenient and trendy cuffed trousers. Enjoy!
How to put a Ribbed Cuff on Trousers?
A ribbed cuff will definitely renew your old pants or jeans. In addition, you can do it merely in a few steps.
You will clearly need:
- pants;
- knitted and ridged fabric;
- needles;
- thread;
- stitching machine.
Now, you are ready to start your new project!
- Snip or unpick the hemline of the trousers;
- Gauge the whole circumcircle of the lower part of the leg and multiply by 8 as it is the breadth of the cuff and has to go with the elastic cloth;
- Cut a couple of rectangles of ridged fabric. The breadth is 5 inches tall;
- Sew the short edges of the tissue rectangles together. Then bend the cuffs in two (that the raw ends meet the flip sides) and split them and the trousers hemline into 4 parts and affix them. Then combine the parts of the hem and the parts of the trousers hemline and affix;
- Sew the coats together (leaving some space for the seams);
- Do this procedure with the other leg;
- Bend the cuff and press it.
That’s all! Now you can savor your new project.
The Final Word about How to Sew a Cuff on Pants?
To sum up, in these posts we figured out how to create new cuffed pants from the ordinary ones coupled with hemming and shortening them. Follow the instructions and everything will work out with relative ease. Success to you in this sewing project!
Please, leave a comment on our post if it was necessary.
In order to do this, you should sign up and enter your personal data (required fields are marked)
Related Posts
How To Sew A Tote Bag With A Flat Bottom?
How To Sew Tulle By Hand?
How To Sew Fishnet Fabric?
How To Sew Quilt Squares Together By Hand?
How To Sew Polyester Fabric?
How To Sew Spaghetti Straps?
How To Do A Closure Sew-In?
How To Do A Full Sew-In Weave?
Uilt Sqhow To Sew Quares Together?
3 thoughts on “How to Sew a Cuff on Pants? – Easiest Ways to Do It”