
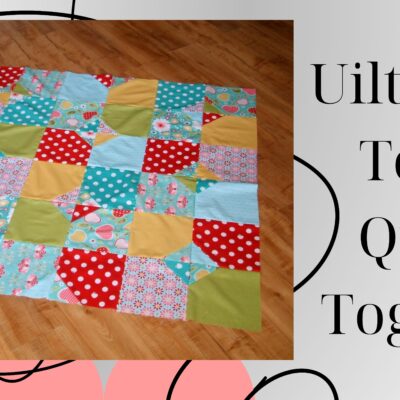
How to Sew Quilt Squares Together in 2023
In each house, somehow gradually, as if by themselves, shreds accumulate – these are fabric squares, pieces of matter, all sorts of remnants. Especially a lot of them are collected by housewives, who themselves sew, knit, and do home needlework. Did you know you can sew simple squares quilt?
In large families, numbering several generations, these fabric squares accumulate for decades somewhere at the bottom of a chest of drawers, in the depths of cabinets, or on mezzanines.
Such flaps can be used for sewing quilts. In this article, you will learn about numerous quilt designs, seam lines, how to make a cutting mat, what is a seam ripper, and share valuable tips on working with sewing quilt blocks.
In order to be successful, you must first carefully consider the work plan in tailoring the quilt top. If all the stages of making simple squares quilt are thought out, and simple squares are selected by color, then sewing will be quick and easy.
What is a patchwork quilt?
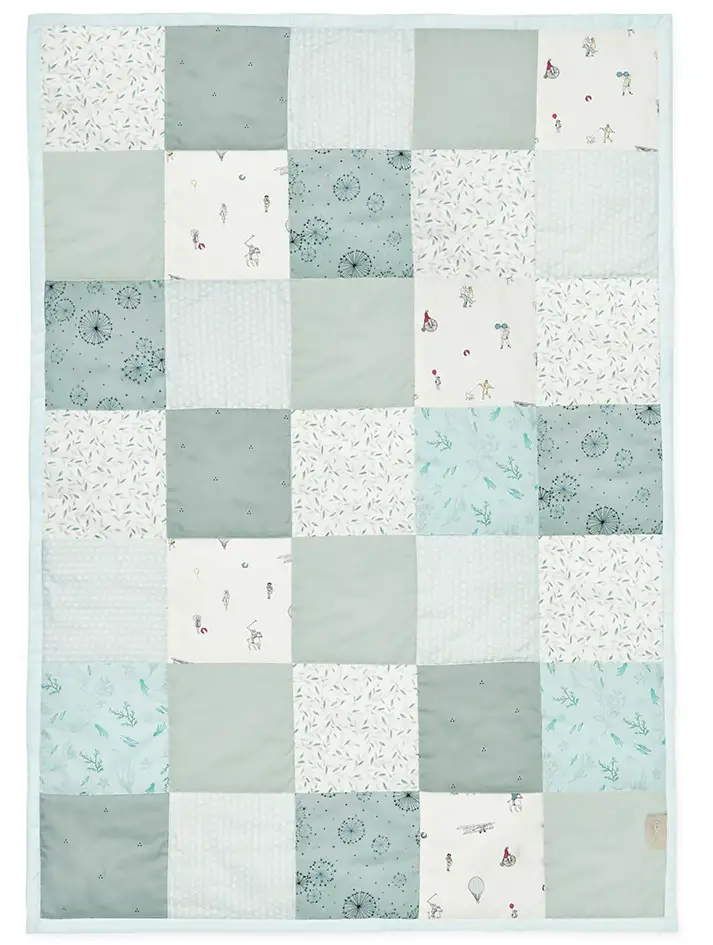
The quilt top is a quilted piece made from multicolored pieces of fabric. Quilt squares were born out of poverty and scarcity. People were forced to use the remnants of old clothes and unnecessary fabric components. Quilt tops and patchwork ornaments were inspired by the ancient art of creating mosaic compositions.
Initially, such sewing was called a “patchwork mosaic.” A blanket made of different fabrics not only warms but also decorates modest everyday life.
Previously, such products were necessarily sewn for newborns. Today, the creation of such quilts is considered a form of arts and crafts in many countries.
You can get a unique and original product with the right combination of fabric colors, alternating directions, and geometric shapes. Using the quilting tutorial on this page, you will be able to sew quilt squares.
Material for a patchwork quilt blocks together
Initially, unnecessary remnants of fabric squares were used to create a quilt top. However, in order to sew a quality item, you need to think over the materials in advance, choosing the right options for backing fabric and squares.
Fabrics for square blocks can be artificial or natural. Popular among the latter are:
- wool;
- cotton;
- silk.
Modern needlework stores sell special quilting kits designed to create a quilt top. To give the product density, it is necessary to use a unique cushioning material that fits between two rows. This will be a heater, but its thickness should not be very large.
Otherwise, the quilt will turn out to be too complex and voluminous. Depending on the type of gasket material for the quilt has specific characteristics:
- Cotton may warp, but the item will breathe easily;
- The polyester/cotton blend fits well and keeps you warm;
- Flannel is a thin material, but has poor elasticity;
- Pure polyester is an easily accessible material, lightweight but not breathable;
- Wool will help create a voluminous and natural product. It can be sewn by hand or on a sewing machine.
Quilt sewing technique
Currently, there are many ways to create a quilt top. The most popular variations of quilt squares include the following:
- Quilt from stripes. The easiest option, with the right selection of colors, the finished quilt will resemble a block fence;
- Simple squares quilt. One of the old American techniques for obtaining a unique pattern. Own quilt is obtained by stitching simple squares around the perimeter;
- Geometric figures. The ornament can be of two or more colors, and the result of sewing from squares can resemble a chessboard, a windmill, a star, or a flower;
- Watercolor. The most creative way. The product is made of squares of different sizes. The main thing, in this case, is the choice of color. When stitched, finished quilts should resemble the canvas on which they are painted;
- Cellular technology. This is a very popular quilt design. Cut out hexagons from the fabric and sew them together. It is better to choose light colors or bright shades. You need to stitch blocks together in one direction.
Equipment
All you need to make a simple squares quilt is to stitch the quilt squares together. The materials for this are very cheap. So grab the quilting tutorial and start practicing sewing squares, do seam allowances, using square points, and a charm pack.
Most of the items you will need are already in your craft basket. When you start sewing the squares together, you will understand that you need to make sewing rows carefully and firmly so that the product does not crumble at the corners and the seams open.
If the square is not stretched, on the right side of the quilt, then the seams may be visible.
Needles
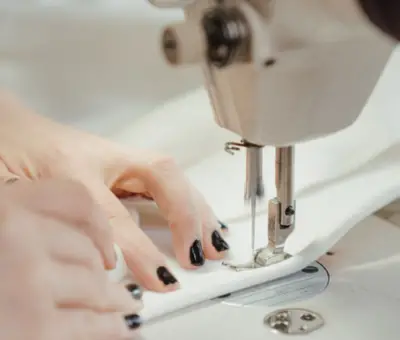
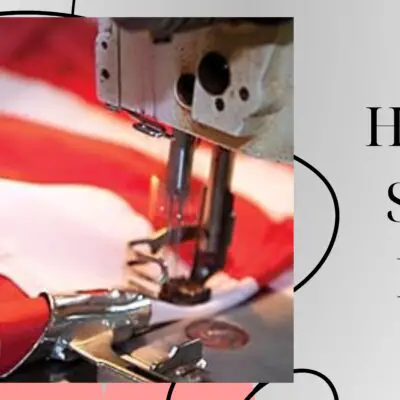
The seams on the fabric must be strong, so for the job you need to take a good rotary cutter, presser foot, and strong threads. Making a quilt top is easier with a sewing machine. You will also need a darning needle with a large eye.
On average, when sewing by hand, you need to make six stitches per 1 cm. When sewing on a sewing machine, set the stitch to medium size.
Threads
When sewing a quilt top, use cotton thread as it is smoother than synthetic thread. Synthetic fabrics are sewn with nylon thread, and silk – with silk thread.
If possible, try to match the color of the threads with the color of the patches. In extreme cases, a black thread is suitable for dark flaps and white for light traces.
There are also “invisible” threads, but they are synthetic and are only suitable for sewing simple squares quilt from synthetic fabrics.
Pencils
Make marks on the wrong side of the quilt squares or the quilt backing fabric. Mark the front side of the simple square quilt with chalk.
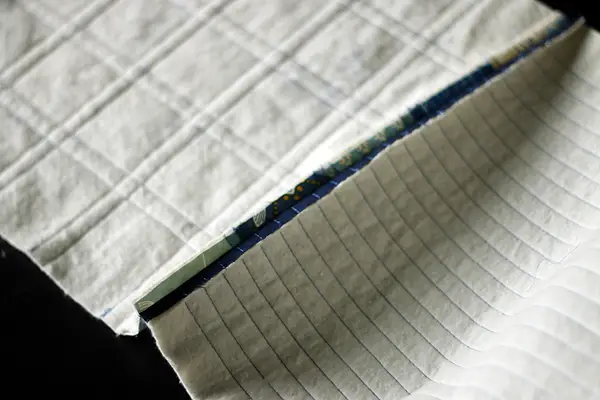
Lining
The lining makes the simple squares quilt more durable. Silk wears out faster than cotton and wool, so it needs to be lined, especially when paired with other fabrics to make simple square quilts.
Many vintage silk quilt tops have survived to this day only because they have a lining and raw edges.
Paper
Graph paper for lining should be dense. You can use old postcards or illustrated magazine covers for sewn rows.
Pins
To avoid basting marks on your finished quilt, use only thin, round-headed pins to secure the fabric.
In what order do you sew quilt squares together?
Whether you sew a cuff on pants or sew quilt squares you’ll have to maintain a particular order. So, before you start sewing, make a paper lining for the first row. It is recommended to use a template that should match the shape and size of the finished quilt top and will help you calculate the number of sewing rows needed.
You can align the entire quilt or multiple trims at the same time. To do this, place the template in the center of the folded paper, press it firmly, and use scissors to carefully cut simple square patterns over it. In order not to break the shape, try to keep the scissors touching the fabric edges.
All the seams and simple squares must be cut in the same direction. In this case, the product will not wrinkle. You can also press the seams. When all the remaining rows have been cut correctly, the product will stay straight even if some seams have to be sewn in bias or seam allowance and then press the seams.
How to work with a pattern?
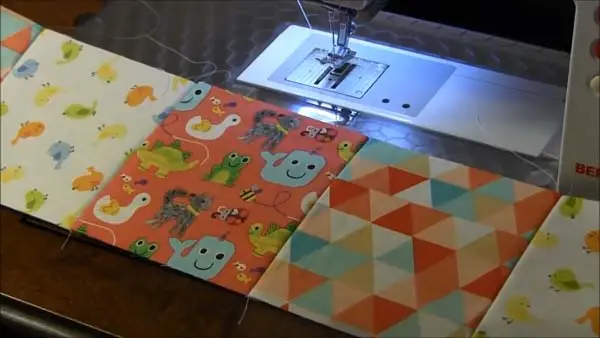
Lay the pattern on the fabric along the length of the thread and circle it with a pencil. Then cut the blocks together with a rotary cutter. Before beginning quilting, arrange the squares together by color to save time later.
To continue sewing simple squares quilt look at the quilting tutorial. Here you will find tips on how much fabric to take, how to use the presser foot, and why you need a rotary cutter. Also, remember that all the seams need to be stitched in the correct order. First comes the top row, then the first row, and finally the second row.
Be sure to press the seams to see how the two rows are stitched together. Check if the folded fabric fits snugly against the edges of the lining. Check the corners carefully to stitch the blocks together and not ruin the shape of the patch.
Patch connection
Take the two rows prepared as above, place them right sides together, and sew the quilt top around the edge. Be careful not to stitch the paper. Quilt stitching thread does not need to be knotted. Just guide it straight across the top of the squares and continue sewing from right to left.
To secure the thread, sew several blocks together from left to right at the end. If the first row is sewn poorly, then on closer inspection you can see the seam allowance and small holes at the joints. To prevent this from happening, always sew the squares towards the seam, not away from it.
Finishing
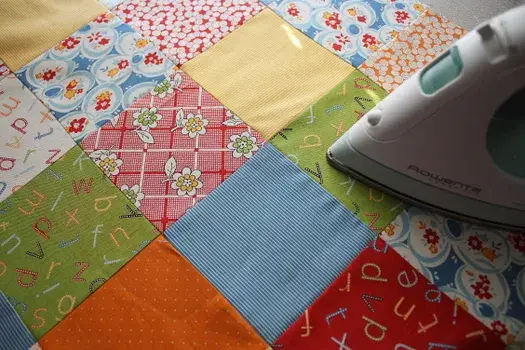
When all the blocks together are sewn on, you need to take out the quilt top basting and iron the fabric from the wrong side. Don’t try to straighten the blocks together.
Then remove the paper backing and iron the quilt top again, this time from the front side, through the damp cloth. Start with the first row. The quilt top is now ready for further processing.
Do not forget how important it is to iron the blocks together well, which will be part of an extensive product. Remember to check the seam allowances before continuing to sew.
Blind stitch
If you need to sew some kind of patchwork fabric to the base, then it is best to do this with a blind seam. This is the neatest stitch that is almost invisible, especially if the color of the thread matches the color of the fabric.
Such sewing will certainly bring pleasure. You can use rotary cutters to stitch blocks together from different fabrics.
How do you assemble quilt squares?
With the help of a machine, you can outline both the incision line and the line along which the flaps are sewn together. In addition, you can flash the first row and second row, as well as connect blocks together. This way it is also convenient to do seam allowance.
Machine sewing details
Sewing rectangular patches of the same width into stripes is easy. Start on the left side of the first row, which is then stitched together in the second row and form blocks.
The big advantage of this method is that it can be used to sew a large patchwork very quickly.
After sewing the seams, smooth them on both sides. Just make sure that they are not visible on the front side of the product. When you have finished sewing the blocks together, iron the front side with a damp cloth.
Lining
If you want to quilt part of the product, place a layer of thin synthetic interlining between the lining and the patchwork and sew these parts. This will make the patchwork embossed.
How do you sew quilt blocks?
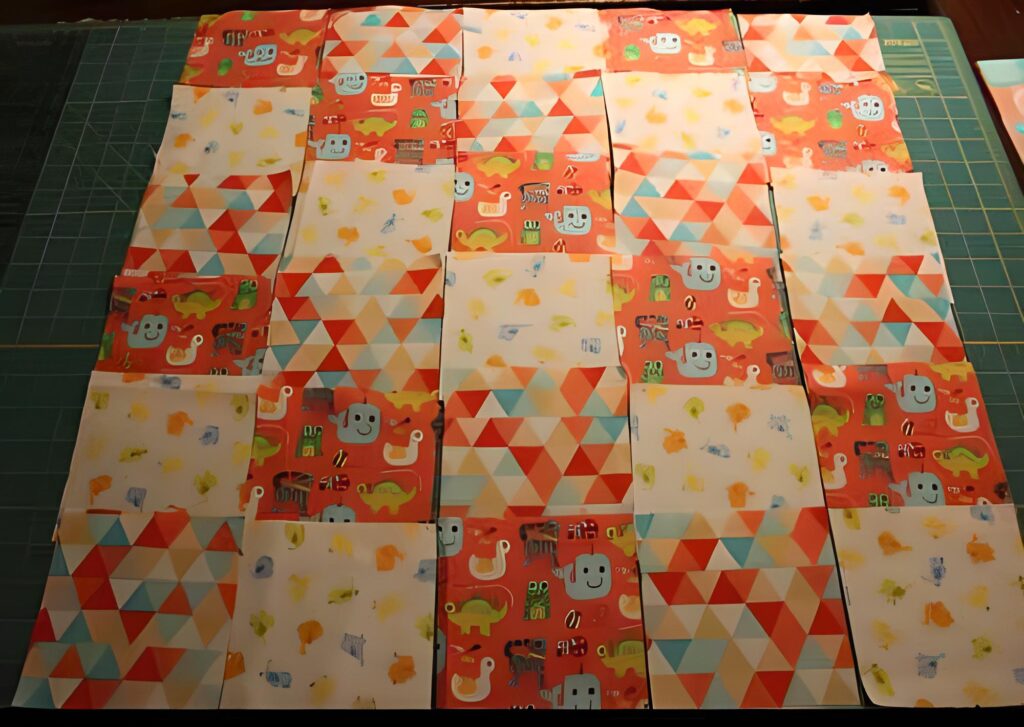
After preparing the fabric and cutting, proceed to determine the principle of their location.
To do this, pre-arrange the details on the basis for the future blanket, marked into numbered cells. This is necessary in order to make sure that there are no errors and that the flaps are compatible with each other in color and texture.
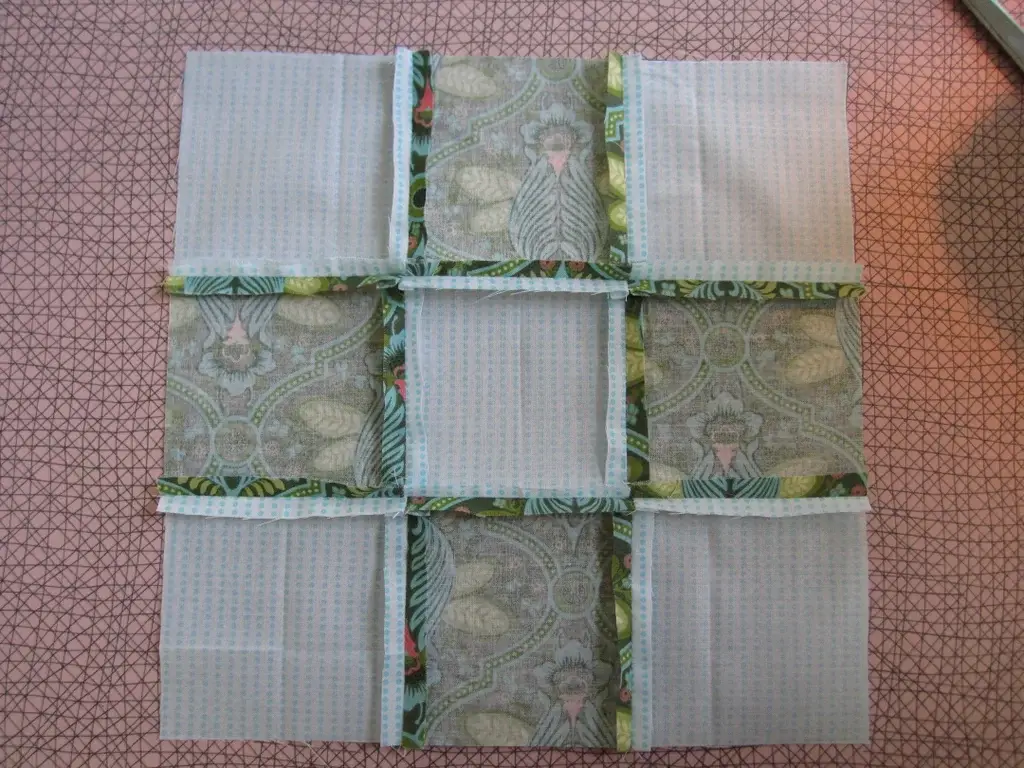
Identical parts can be laid out symmetrically in the form of a cross, rhombus, diagonal line, or randomly.
Sewing the front of all the rows
The easiest way to sew in patchwork needlework is a method based on the use of fabric squares. The difference between the techniques lies in the location of the parts on the base and the assembly method.
Beginner needlewomen should know the following:
- if the square has a side of more than 5 cm, then the cutting is carried out along the shared thread;
- blanks of squares are sewn into long strips in accordance with the prepared scheme or scattered;
- rectangles are sewn together with short sides;
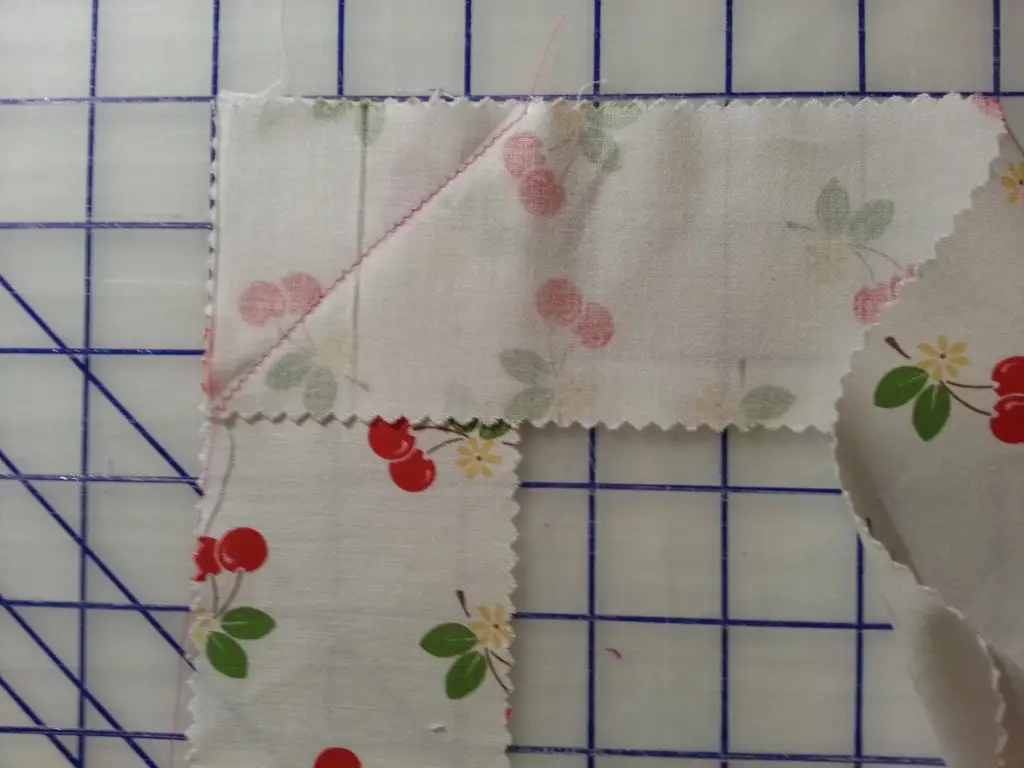
- the sewing technique is as follows: the first square is superimposed with the front part to the second, then both are sewn along the allowance line. The rib is ironed and ironed to the side of the square of a darker fabric;
- after sewing the third square, it is folded with the front side to the second and done the same as in the previous paragraph;
- the squares are sewn together one by one, resulting in stripes. They are stitched along the allowance line and ironed in one direction.
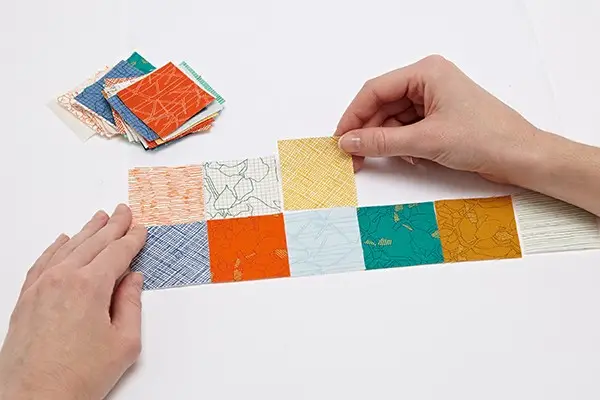
Technique “Quick squares”
Laying out a mosaic of squares is a simple technology. You only need the proper selection of fabric. Squares of the same size are cut out of fabric pieces.
In order for the blocks to be formed, you need to sort them in accordance with the color scheme, pattern, and texture. It will not take much time to create such a bedspread, especially if there is no need to follow the sewing scheme and the sequence of flaps.
We sew the squares into ribbons using the technology described above, and we connect the ribbons together.
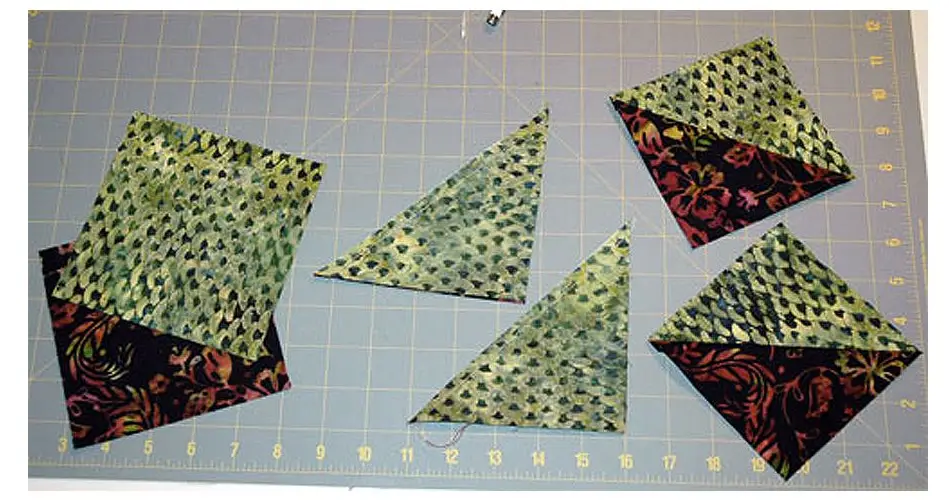
Technique “Diamond”
This technique is an intricate arrangement of a square within a square. Often this method is used as an element in an ancient technology called “Russian Square” or “Pineapple.”
Sewing such a patchwork quilt is simple and easy.
Two fabric pieces are taken, and shreds are cut in the form of squares: 2 from one and 1 from the second.
Two identical squares are cut along a diagonal line into two parts. As a result, isosceles triangles are formed.
With the most significant side, these four triangles are applied to each of the four sides of the square and sewn.
It should be noted that the seam allowance is 0.5 – 0.75 millimeters.
It is worth noting that one blanket may well be made with three types of shapes: a square, a triangle, and stripes.
How do you piece a quilt together?
After the patchwork base of the quilt is ready, we proceed to the assembly stage. In order not to take up much surrounding space when working, it will be more convenient first to divide the blanket into blocks and sew it in parts.
The seams are sewn with a stitch “in the seam” and then over the “zigzag” butt. Initially, you need to quilt all the blocks separately (together with synthetic insulation and lining) leaving large allowances (at least 10 cm). Use simple shapes.
The patchwork top should be smaller than the lining and synthetic insulation.
How to sew insulation with a patchwork quilt?
This article will surely be helpful for those who are wondering “how to sew quilt squares together.” Sewing quilt squares is not an easy but exhilarating task.
When you have finished laying all the rows and out the quilt on the floor (right side to the floor), the edges must be attached to the floor surface with adhesive tape so that the canvas does not move.
First, you need to carry out the stitching of the patchwork top on the blocks. Then with all the accuracy, you should straighten the synthetic insulation.
There is no need to stitch together pieces of synthetic insulation. It is enough to lay the edges on top of each other and then pin them with a pin. After connecting the upper parts, the lining is sewn with a blind seam.
With such an assembly, the stitch will look beautiful and neat, and your painstaking work will be appreciated.
Before I go to the conclusion part a little reminder for you is how much you try you can’t get the best of sewing without a quality sewing machine. Now for suggestions, you can try reading the review of the Brother sq9285 machine.
Final Notes
After all the patches have been sewn into one solid blanket, you can remove the paper by moistening it with a damp sponge or spraying it with water from a spray bottle.
When all the paper is removed, all that remains is to iron the seams well, and the top of the quilt is ready.
5 thoughts on “How to Sew Quilt Squares Together in 2023”
Leave a Reply
Related Posts
How To Sew A Tote Bag With A Flat Bottom?
How To Sew Tulle By Hand?
How To Sew Fishnet Fabric?
How To Sew Quilt Squares Together By Hand?
How To Sew Polyester Fabric?

How To Sew Spaghetti Straps?
How To Do A Closure Sew-In?
How To Do A Full Sew-In Weave?
Uilt Sqhow To Sew Quares Together?
March 1, 2023 at 5:35 pm
The patchwork quilt is a real trend. I’ve already sewn it. Now I want to make cushions in this way too!