
How to Use Free Motion Quilting Foot? A to Z Guide
If you are looking through this post about How to use Free Motion Quilting Foot for quilting, probably you are in search of something that will improve your product or you merely covet to familiarize yourself with something new.
So, let`s get started!
What is a Free Motion Foot?
The free motion foot (or a darning foot) looks like an oval-shaped (or, maybe, boxy) opened or closed toe. However, several models could have a little difference.
Certain models of free motion feet can be with springs (that provide larger movement, so it is effective when you possess a vast coat of fabric (batting, for example)) or without them.
They also can be distinguished by the size and the material that is made (metal or polycarbonate) of the foot.
Open toe foot has an open front space where the needle sits. Therefore, you have better visibility while stitching and it is that simple to thread your needle just like to thread a bobbin case.
The closed-toe foot has no free area, it ranks all around the needle and completely covers it. On the other hand, it lessens the potential that a closed-toe foot can latch onto something while sewing. It is also comfortable to control the tension on the fabric. Keep in mind that a clear plastic foot allows it to see crisper than a metal one.
If you are wondering about the kind you need (a low shank or high shank style foot), it has already been defined by the model of the machine.
Low shank sewing machines have purely one-half inch of the free area between the foot and the screw. If there is more free space, it is a high shank machine.
What does a Free Motion Foot do?
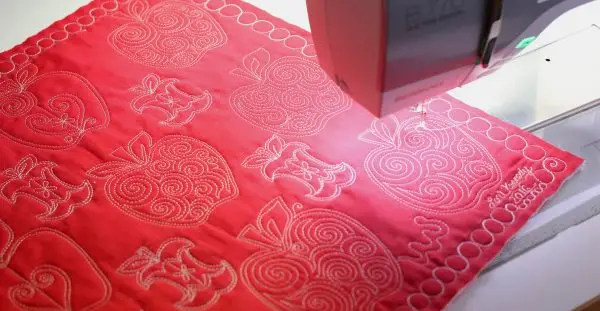
The free motion foot does not squash your cloth consistently. It is possible to obtain pretentious styling without perpetual stopping. With any type of darning foot, you can glide a blueprint between the foot and fabric without difficulty and unnecessary tension.
One type hops during the up & down motions of the needle. When it is hopping up, the cloth is free and you can shift it as you desire. Another type soars above the fabric as well as holds it smooth and it remains easy to move the fabric during sewing.
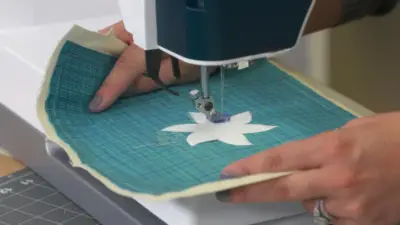
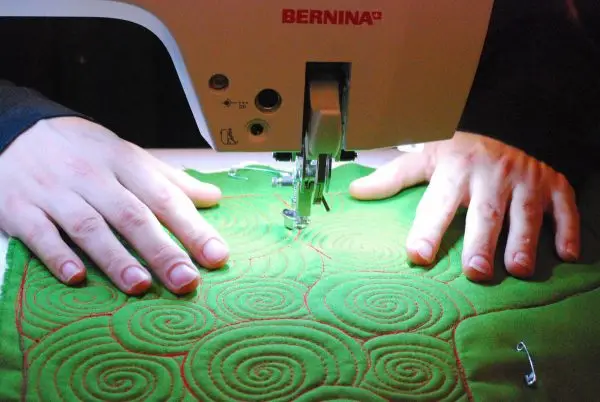
Below you can figure out an ordinary procedure of free motion foot working:
- Affix your darning foot;
- Drop the feed dogs (or hide the teeth with a darning plate);
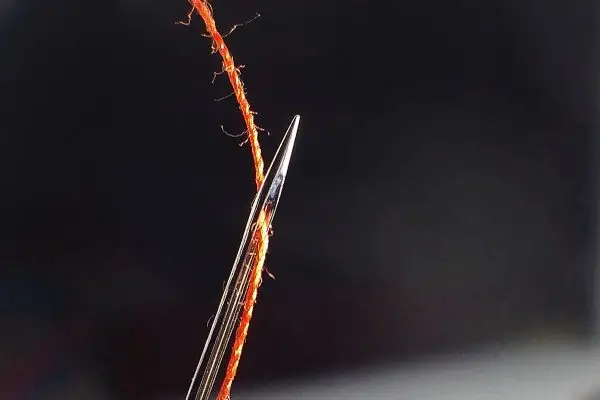
- Thread the needle;
- Put threads in the bobbin thread;
- Shift a blueprint beneath (in case of implementation);
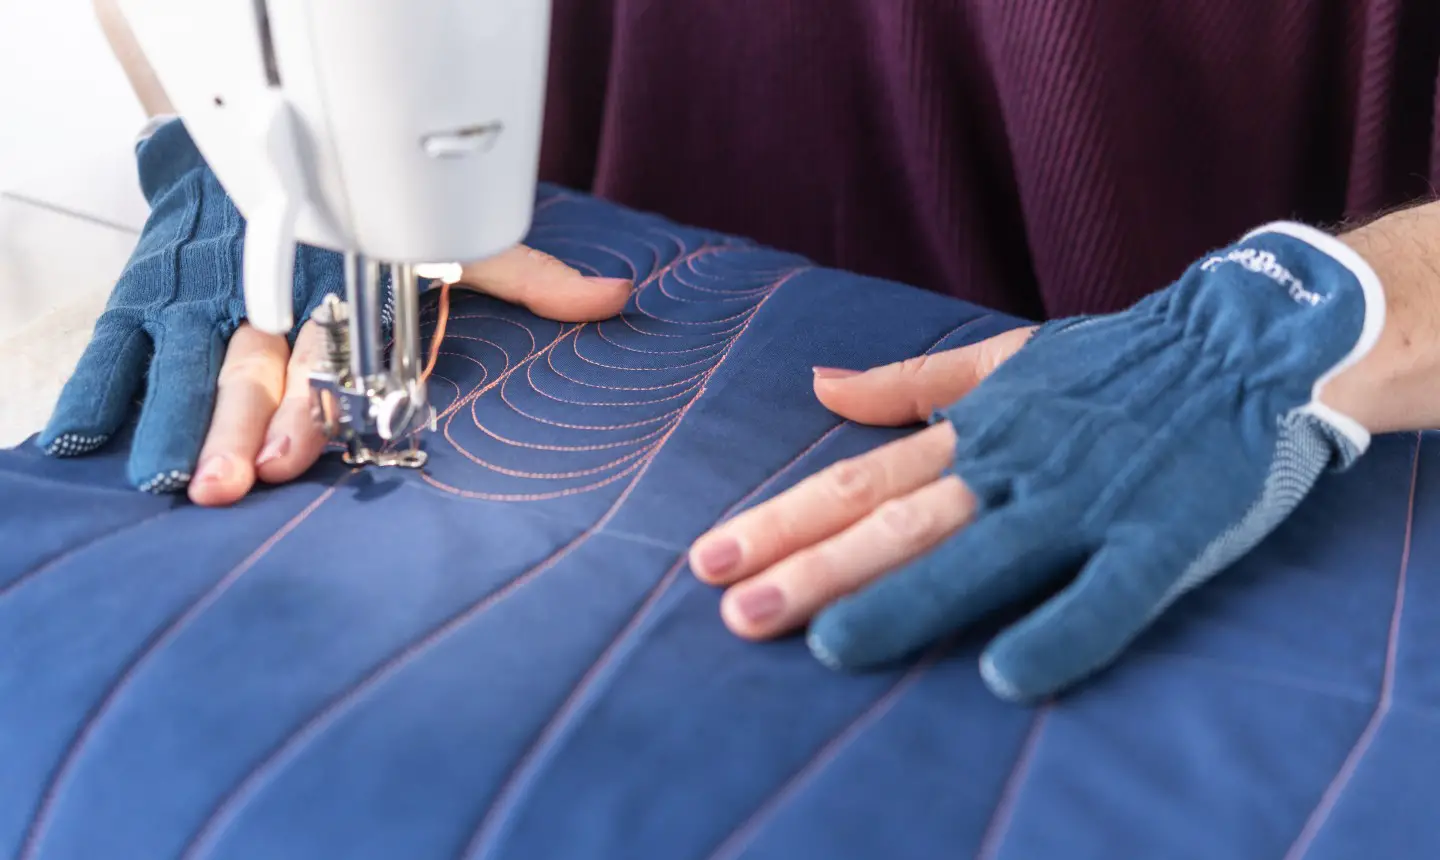
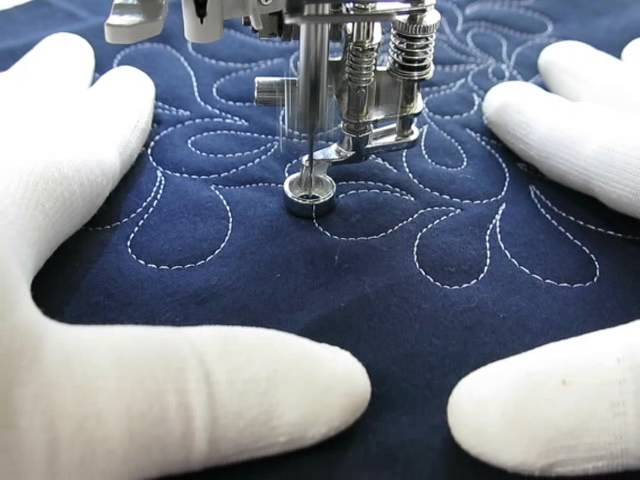
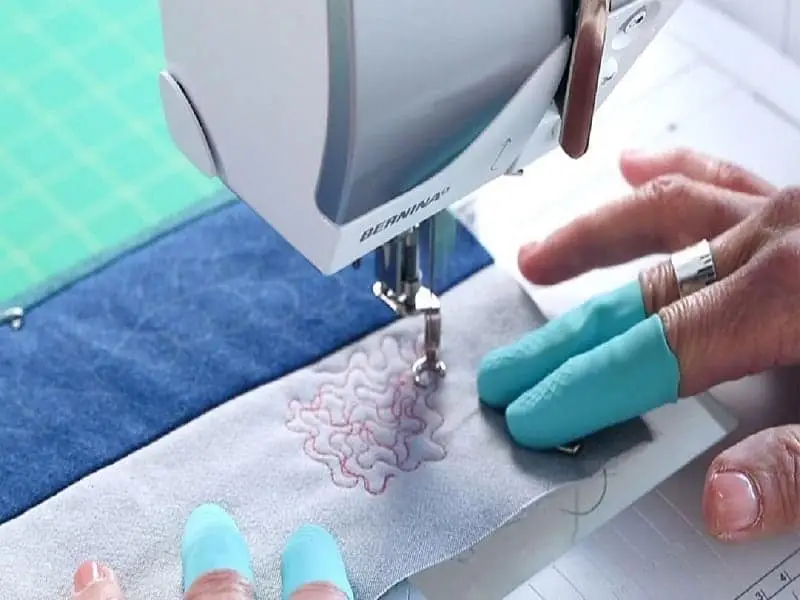
- Put your hands on the fabric along with the foot;
- Turn on the machine and manage the fabric for creating your styling.
How to Modify your Feet to Make it Ideally Fit your Machine?
To begin with, let`s figure out why altering your foot is so useful.
Firstly, it is worthwhile for being able to create and realize designs because it is unbearable to make accurate stitches with a firm basis and the foot hopping upwards and downwards on the face of the quilt.
Secondly, the bar through the top is engineered to run through the needle bar. When the needle is at the top, the foot is caught up with it, meanwhile, when the needle is at the bottom, the foot lowers as well, and consequently it is too close to your quilt and crushes it. Moreover, when the foot is hopping to and fro, it is much more troublesome to monitor what you are sewing.
Thirdly, your quilt will be too complex to wiggle.
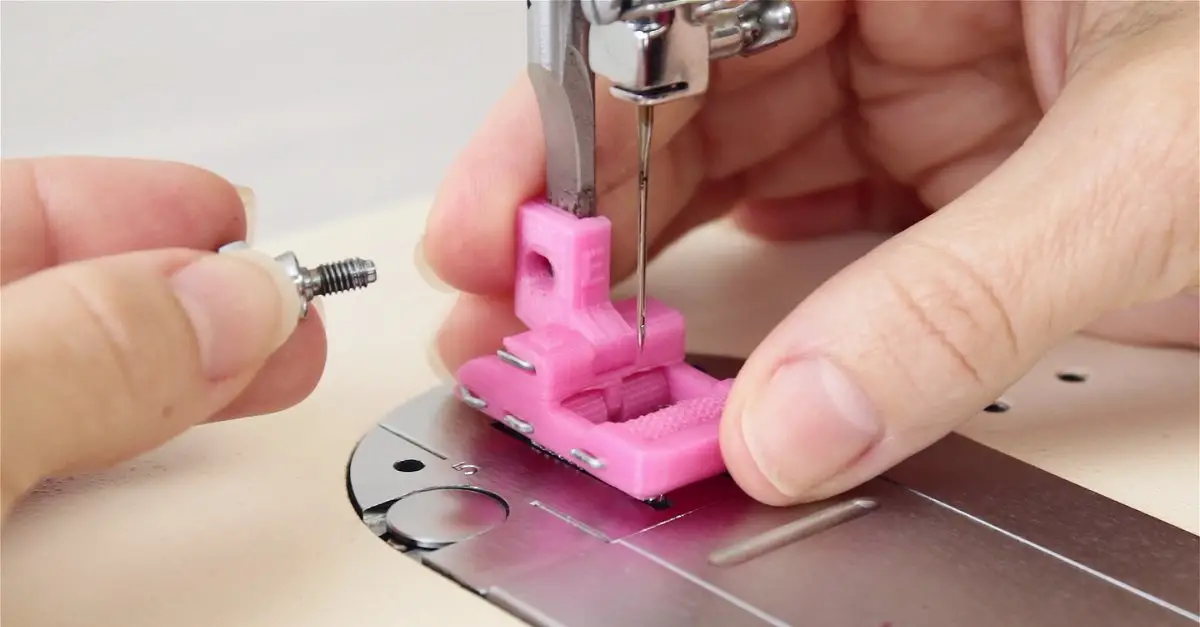
It can be concluded that it makes sense to get out of that panel by curving the top bar backward by means of a pair of needle-nosed pliers.
Step by step actions
- When the upper bar is backward-curved, the darning foot is in the lowest position (that is pressing the quilt severely). In order to repair it, you could put an elastic band (tie approximately with 4 nooses) from above the foot in between the spring and the curved metal bar in a way that the foot will be upturned a little bit.
- Then, spin the extra elastic band all around so it does not interfere.
- Be certain you fitted the darning foot to your sewing machine and it is set at the required altitude. Place your foot on the machine, then put 3 layers of a quilt (the quilt top, the wadding, and the backing). Drop the foot and glide the layers all around.
A correctly installed foot should go seamlessly and not be overly high to have some free area between the foot and the quilt (for the avoidance of threads breaking), the quilt should move easily. It can be regulated by the elastic band (if you require the foot to be up, please attach one more noose to the top, in order to make the foot low you should get rid of the noose).
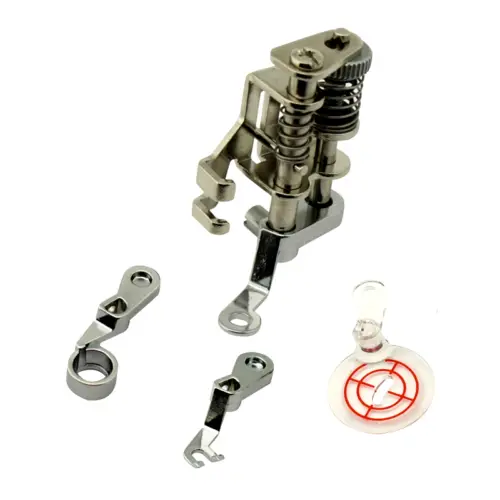
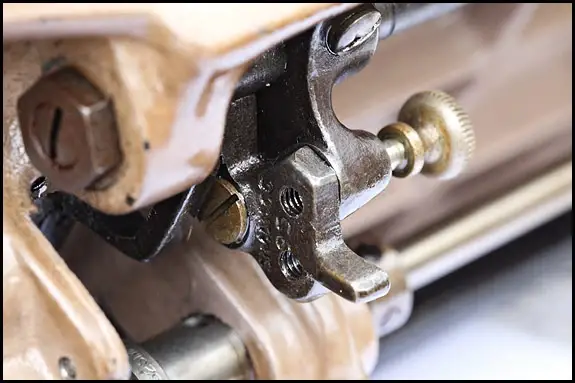
- The next widespread trouble is the base of the foot. It is much more readily to sew when you can observe the needle and threads. To fix this problem you could take a pair of nippers for jewellery and pinch both parties of the red spots on the base.

- Then grind all the rugged places (with the help of the emery paper, for instance).
And that was the last step. Now you can enjoy the special instrument that fits you brilliantly!
Which Foot is the Best for Free Motion Quilting (or fmq)?
There is a wide assortment of feet and every person can choose his ideal option for free motion quilting, notwithstanding we can suggest some mesmerizing variants. For instance:
Free Motion Quilting Foot for any Low Shank Sewing Machines
This item suggests one-quarter inches of the area all around the needle. The foot is wonderfully suited for needlepoint as well as quilting. In addition, this construction helps you to save the seams safe and sound and there is enough space for observing the needle motions.
You can also control the tension while sewing. Moreover, it is rather safe for your fingers, because it has a fairly thick tip of the foot and shields from the needle.
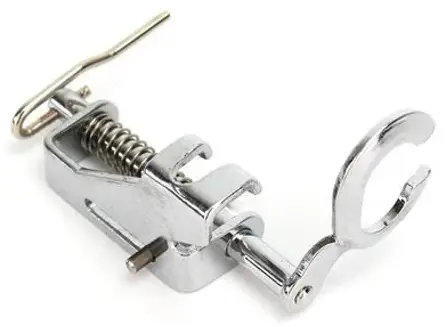
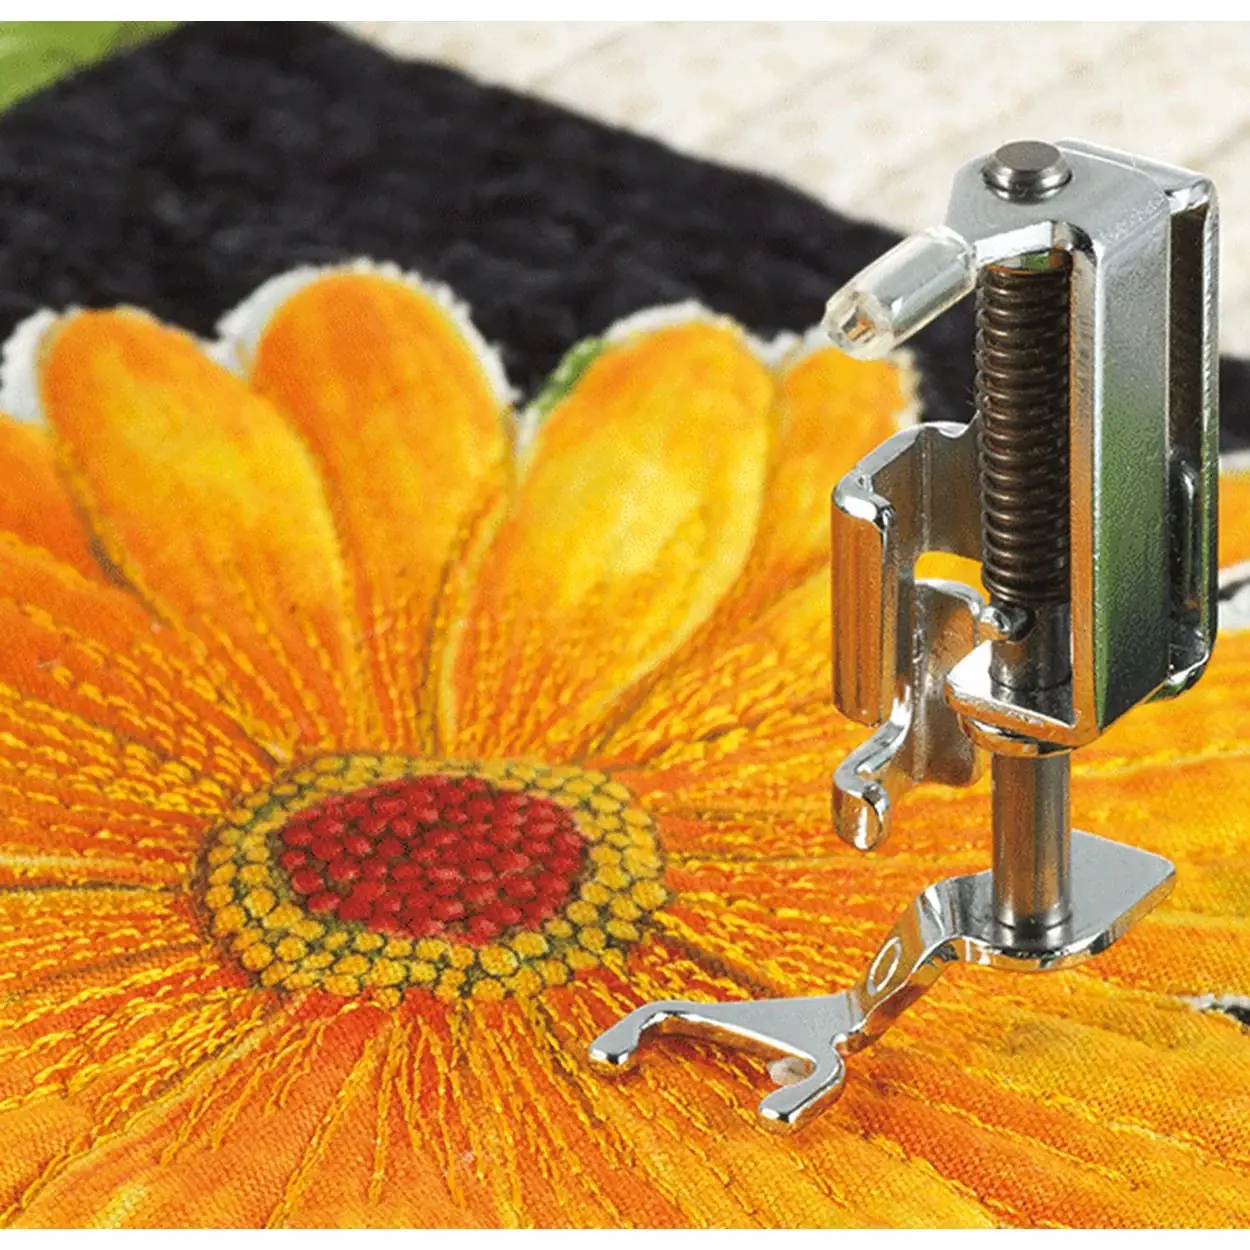
Metal Free Motion Quilting Foot with Spring Action
With this durable metal foot, you are able to adhere to a blueprint coupled with spinning the stitches whatever you like. Also, this spring action permits to operate with any kind of thread astonishing and control the tension. What is more, it is appropriate for the overall majority of shank sewing machines.
Metal Open Toe Free Motion Quilting Foot
This foot is made of a solid material that is tough to break. The wide-open toe ensures high fabrics such as wadding, cotton fabric, pure silk, etc.
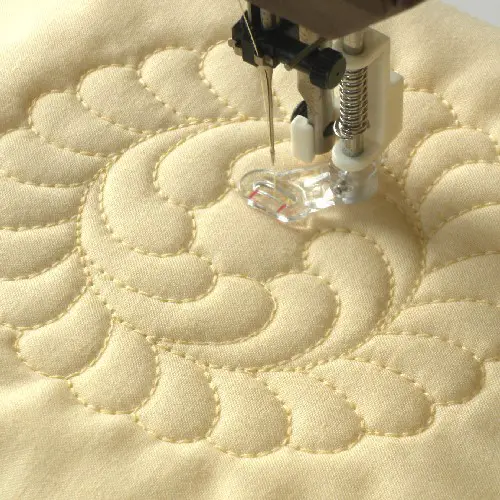
Clear Sewing Foot for Low Shank Sewing Machines
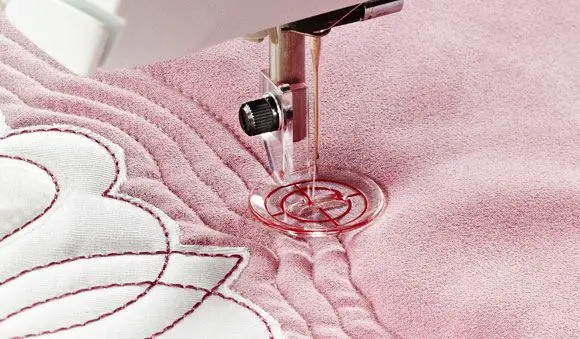
This type of foot has a big difference from the rest. It is made of clear plastic that provides complete visibility and hovers above the fabrics during implementing itemized embroidery. The foot can place thick fabric layers (on-quarter inches thick) and generally operate with one or another fabric. Additionally, works with the majority of shank machines.
Do you Lower the Presser Foot when FMQ?
This is such a significant question, so let`s clarify whether or not we should lower the foot.
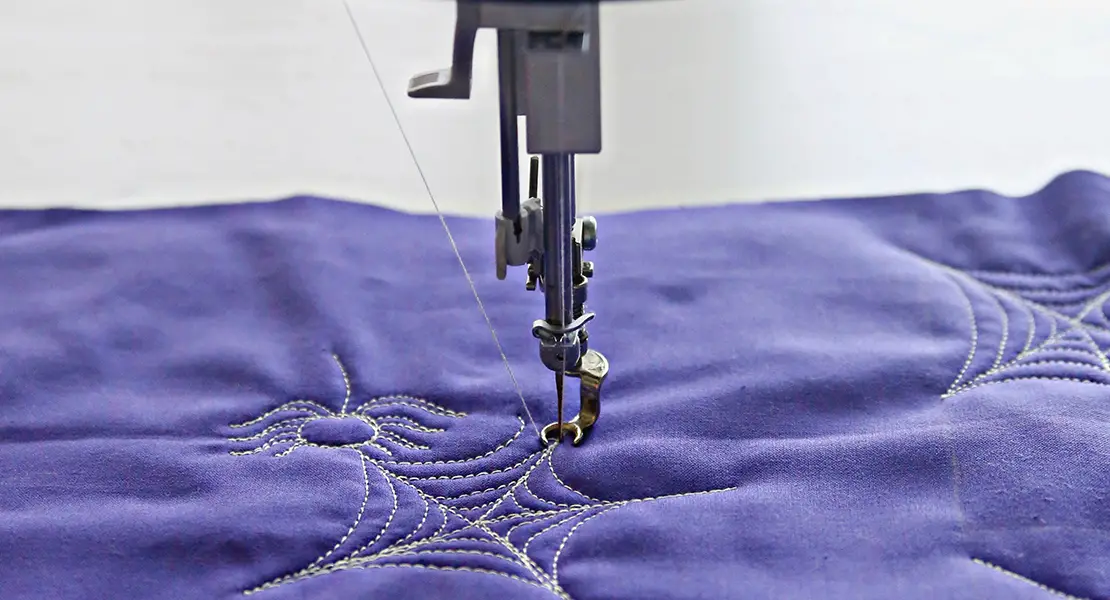
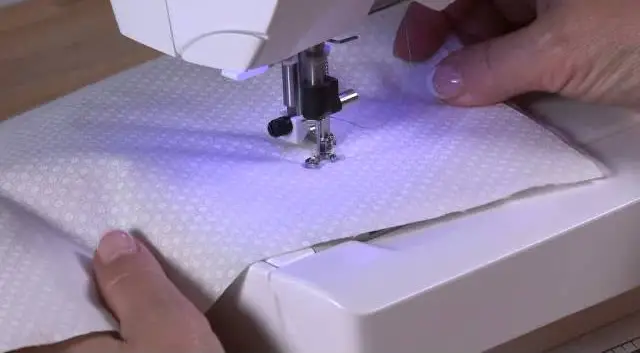
In order to implement free motion quilting conveniently, you should fit the foot to your sewing machine at the appropriate height. Insert the foot in your machine and then drop it, so you can glide the quilt all around, the foot will go seamlessly.
You will be able to propel the quilt loosely and it will not cling to the foot. But keep in mind that it must not be at an altitude too high (otherwise, your threads will be torn). It would be best if you observed the free area between the foot and the area of your quilt.
So, the answer is definitely YES!
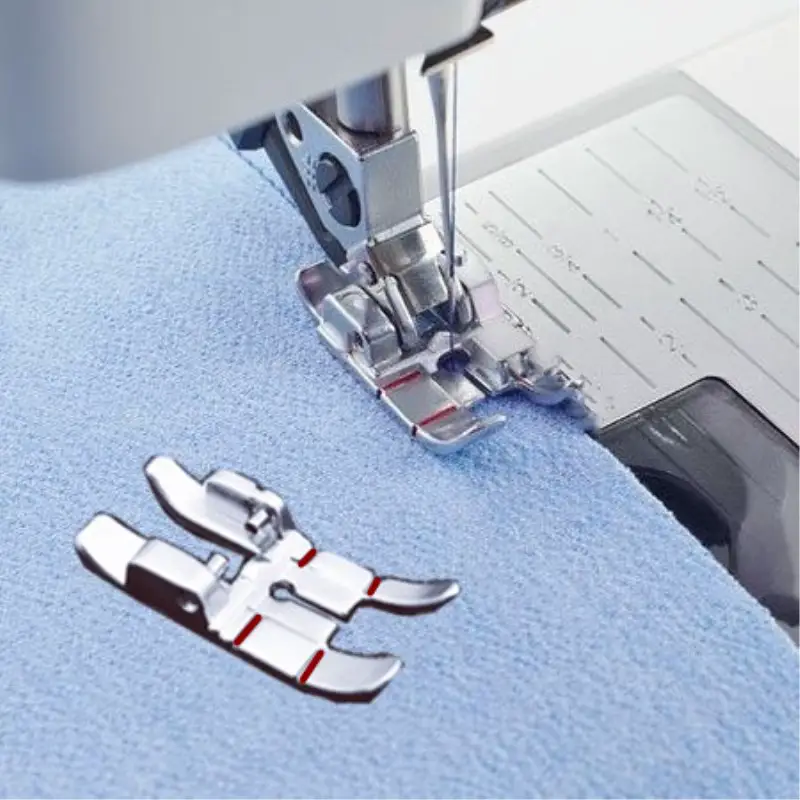
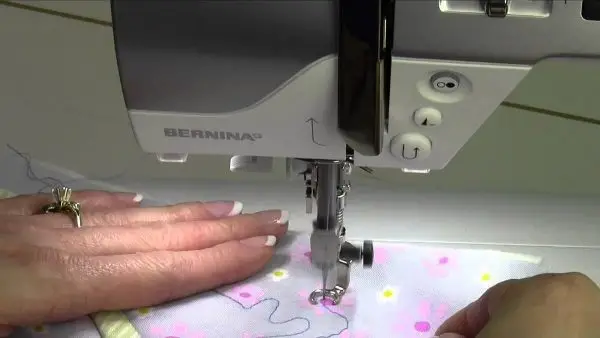
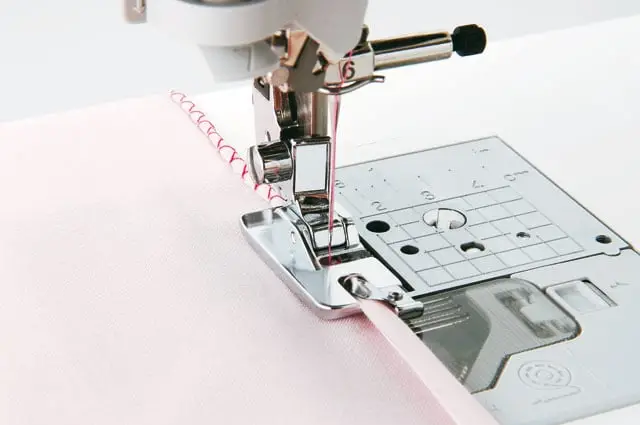
How do you use a Quilting Presser Foot?
A walking foot is a specific presser foot for quilting. It’s an embedded feed dog grip, which pushes the top coat of fabric during its movement. It could be a piece of cake to create your extravagant designs with the help of this item.
The activity of the walking foot’s feed dogs operates in lockstep with the feed dogs of the machine. They capture the wrong side of the fabric. All the coats of the embroidery roam through the machine at a steady pace and do not slide, courtesy of the timed action.
This particular item is an outstanding fit for being used wherever you want but they have no equal in machine quilting, dealing with products that are produced from thick fabric or a number of layers (“quilt sandwich”), sewing up “fiddly” and unwieldy fabric (such as a doormat, denim, etc.) that have the characteristics to slip or cower during their crossing underneath the regular foot.
Take into account that you may have to label the position where you need to cease sewing. Many of the feet do not have any markings that can assist you to estimate the interval.
Furthermore, a foot is a bit big to move all around the bends unimpeded. It is intended for the beeline sewing machine quilting, namely for huge as well as mild curves. For more bizarre embroidery please utilize free-motion quilting techniques.
You should bear in mind that there is a differences in methods of using a walking foot. Advice you to get acquainted with every kind, you could watch a tutorial or read a post, then practice a bit and choose the most relevant for you. But prior to this confirm that you have acquired the quilting foot specifically for your machine model.
So, below you can check the more detailed info about using a Walking Foot.
Affix the leverage which proceeds upwards and downwards to the needle bar and enshrine the foot on site (when you drop the needle, the arm should move above and below).
Seam in the seam
If your stitches are compressed against the side, you will observe that one aspect of the stitch is lifted and the other aspect is tucked away in a ditch.
Perhaps this is a point to comment on — “Stitch in the Ditch” means needlework on the lower aspect of the stitch or where there is not any seam allowance fabric beneath the block element (the ditch).
Bring up the bobbin thread before you begin stitching. Put the embroidery under the sewing machine, then drop the foot. Your needle should be located precisely below the sewing machine in the “ditch” stitch. This way you will conceal your stitches.
Quilting encouraged by matches
Thread the needle and the bobbin. Commence quilting every string with the direct line. The next string stitch betwixt the two strings you have quilted.
Sew direct lines along the whole perimeter downwards one string, then continue stitching another string.
Replay the whole procedure once again in the first and the second directions. The ultimate embroidery will have a breadth of a match in-between every seam.
Several years ago this method was not known yet, but now it is a popular one. A little practice and you will get a superb product or even maybe find your personal style.
Quilting in the form of lattice
One more astonishing method to fill a great deal of free area.

Prepare everything necessary for your embroidery. Wind up threads on the bobbin and the needle and begin with casting a line downwards midway through the quilt in one direction. I would advise you to obtain an additional bobbin case as it may be unpleasant while trying to reach the bobbin back to the right tension for continued sewing. Then use the free motion quilt technique from end to end.
Sew more strings in one direction with the help of your foot as the head. Continue sewing downwards one part and then another.
Exploiting a ruler, make the midpoint string and line it up from site to site on the second part. Then sew crosswise your last stitches. Keep on sewing on the left and on the right side of the medium seam until accomplished. Now, enjoy your outstanding design.
How to Set Up the Sewing Machine for FMQ?
Setting up your sewing machine correctly along with installing the right darning foot will resolve your possible problems such as omitted stitches, tension troubles or torn thread. So here are some advice to simplify your work process:
- broaden the area for sewing from the left of the needle
This way, you will have enough space for using both hands, therefore the quilt will not slide off the left side of the machine. It is essential for managing your fabrics. In order to bring to life this brilliant idea you just need to withdraw the toolbar from the back side of the sewing machine and install the table for sewing.
- utilize the unified opening stitch plate
This is an additional attachment, notwithstanding it`s worth buying. The significant oval-shaped area which comes with the overall objective stitch plate permits better motion of fabric in the course of the process of quilting and the stitches may not be well shaped, for example. The fabric can`t be rolled down into the bobbin case while stitching, which can deform or miss the seam, and the unified opening stitch plate will assist to remove the missed one.

- select the suitable free-motion foot
Relying upon the kind of quilting you desire to obtain, you can implement one or another style of free motion foot (fmq). A lot of good items you can search for “brother”. Below you can uncover some of the free motion feet, that may be very useful.
Free Motion Floating Foot
Free motion floating means that this type of foot will hover above the fabric when exploited at high speed. When the sewing machine is at a low velocity, the foot will go up and down with every seam to retain the fabric on the stitch plate.
Free Motion Spring Action Foot
It operates with the back and forth motion of the needle owing to spring and an arm that sits up there of the cog for the needle. This item remarkably interacts with thick and distinctive threads. It’s necessary to possess no less than one floating and one spring action foot in your tool chest.
Clear Open Toe Free-Motion Foot
With the help of this item, there is no longer necessary to eliminate the Foot or Ankle. You merely need to click on the foot and go on!
Open Toe Stippling Foot (Floating)
In order to utilize this hopping foot, you will require to withdraw the Foot Ankle. The advantage is that it’s effortless to find out where you’re stitching insofar as the front end of the foot is external. When you raise the bobbin thread, it’s convenient to stick the thread from behind the foot. In fact, this is much more complicated to do, when the foot is enclosed.
Free Motion Echo Quilting Foot
This one is ideal in all directions for generating echo quilting around the overlaid shape because the cup shape lets you glide over the ends of the application without the foot catching on the edges of the application.
Free Motion Guide Foot (Floating)
Other great feet for echo quilting. There is plenty of guidance in order to hold the lines uniformly located.
Open Toe Free Motion Spring Foot VS Closed Toe Free Motion Spring Foot
The Open Toe Free Motion Spring Foot is an opened frontal foot that improves visibility of the whole workspace, so you are able to fall into tiny areas and gaps.
As regards The Closed Free Motion Spring Foot, it possesses a tiny imprint that is loved by a huge group of humans.
And the reason is that they sense a better appearance with a small foot.
Sensor Q Foot
The suggested variant is ordinarily utilized for embroidery, but it is no less helpful in free motion quilting by applying dense fluffy batting.
To my mind, you need to possess a minimum of one spring action foot in your workbox as it can improve the quality of your free motion stitching. Additionally, ensure that your feet are set up adequately. Otherwise, they would not work. The spring action feet operate jointly with the motion of the needle and the arm on these feet needs to sit on the screwball that keeps the needle in the same position.
You can check customers’ comments or watch a tutorial by a needlewoman and decide if “brother” suits you or not.
- set the sewing machine to the suitable free motion mode
The suitable settings are determined by the kind of free motion embroidery foot you need (floating or spring action). In order to set up your machine, you need to check the SET Menu. You are able to select whichever mode, nonetheless, it should coincide with the foot you are exploiting.
- drop the feed dogs
When the sewing machine is set up to any selected mode, you will find a comment on the screen that suggests you drop (or cover) the feed teeth.
On the one hand, when their teeth are dropped, there is no way to monitor the length of the stitch, because it is tracked by the rapidity of the movement of the fabric coupled with the rate of the sewing machine.
On the other hand, if we leave the teeth up, the seam length will be set to a particular quantity. Ordinarily, the length will be permanent because the feed teeth are able to feed the fabric equally.
It is up to every person to cover the feed teeth or not to cover. There are some people who feel that they have more possibilities to monitor the situation if their teeth are up. However, for me, keeping the feed teeth up is solely offering extra wear on the feed teeth. You cannot take advantage of this wear and tear.
- exploit the Needle Stop Up & Down Function
This is an essential component in order to accomplish excellent free-motion quilting. It is much more comfortable to possess this function in your sewing machine in the capacity of the embedded one.
Otherwise, you will have to place the needle into the fabric whenever you pause by hand. Each pause threatens you with large stitches which are challenging and labor-intensive to remove. When you take a break from having the needle in your quilt, subsequently it cannot proceed until you bring up the needle.
To sum up, you should solely have the proper instruments and set up your sewing machine accurately.
Hope these pieces of advice will assist and you will not be bewildered by free motion quilting anymore. Please leave a comment if this post was useful for you. Otherwise, we wish you plenty of one-of-a-kind designs!
Related Posts
How To Sew A Tote Bag With A Flat Bottom?
How To Sew Tulle By Hand?
How To Sew Fishnet Fabric?
How To Sew Quilt Squares Together By Hand?
How To Sew Polyester Fabric?

How To Sew Spaghetti Straps?
How To Do A Closure Sew-In?
How To Do A Full Sew-In Weave?
Uilt Sqhow To Sew Quares Together?
2 thoughts on “How to Use Free Motion Quilting Foot? A to Z Guide”