
How to sew barbie shorts and other fashion clothes?

If you or your child have ever had a Barbie doll, you might be aware of the problem to select the right cute doll clothes. Another problem may be that in your local shop there is no certain clothing you need, or it cost too expensive on a special site as for simple Barbie clothes. Let`s look at how To Sew Barbie Shorts on Your Sewing Machine.
Subject to these problems being well known to you, check out this tutorial which is plenty of useful advice and patterns that will help you to perform on the highest level.
In this step by step tutorial in a browser, you can search how to sew different types of clothes for your doll such as:
- patterns for sewing;
- a Barbie dress;
- a Barbie skirt;
- a wide variety of accessories for Barbies and other dolls.
- trousers and shirts for your dolls.
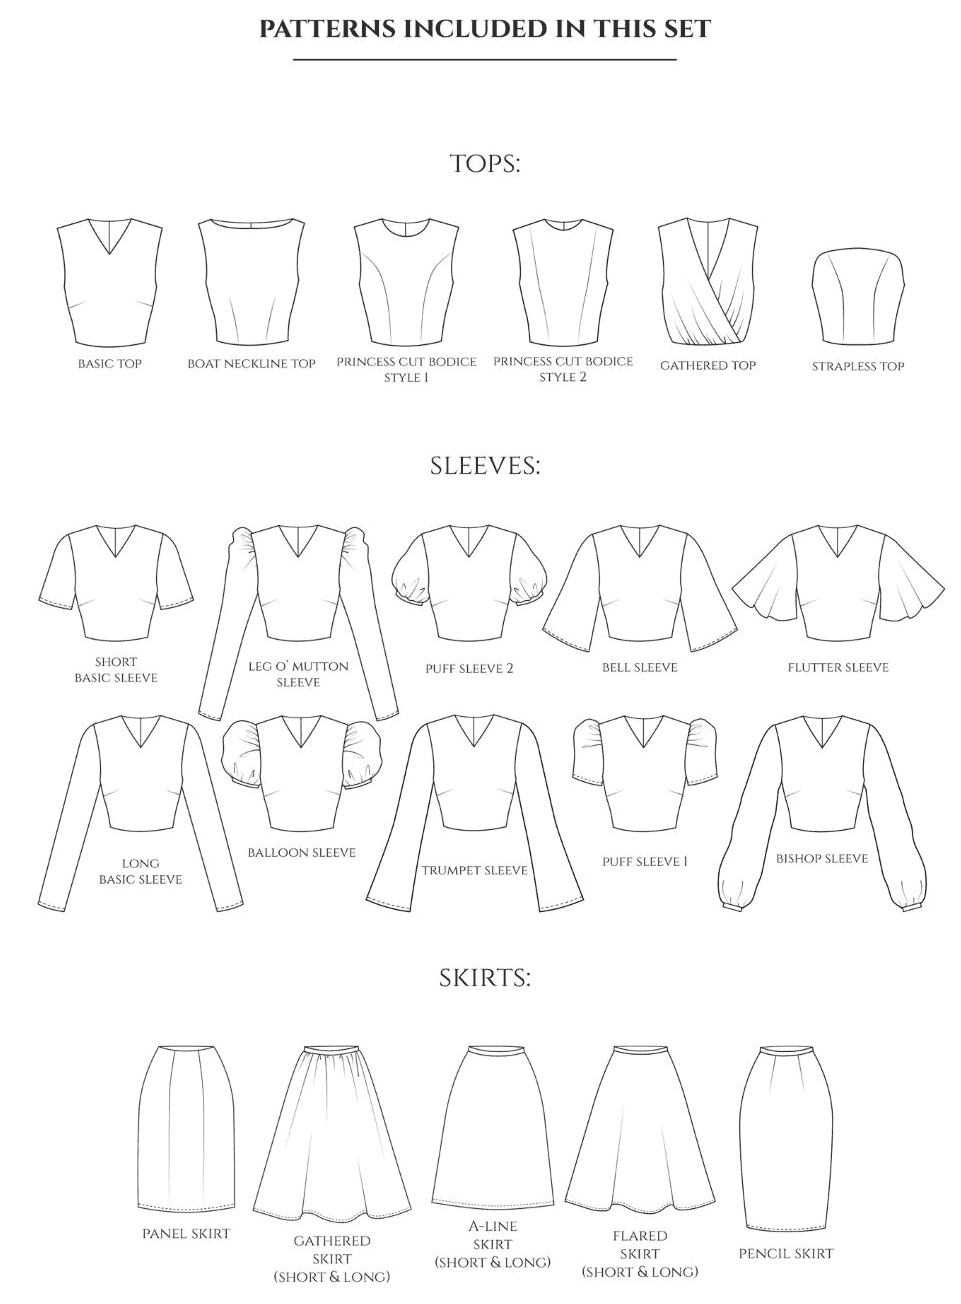
Here you will be able to find various patterns to produce doll clothes, using any of the patterns you can create clothes and combine them with whatever you want to do it. Hope these tutorials and patterns will bring you lots of fun and teach you how to sew clothes for dolls.
Main advice on sewing tiny sizes
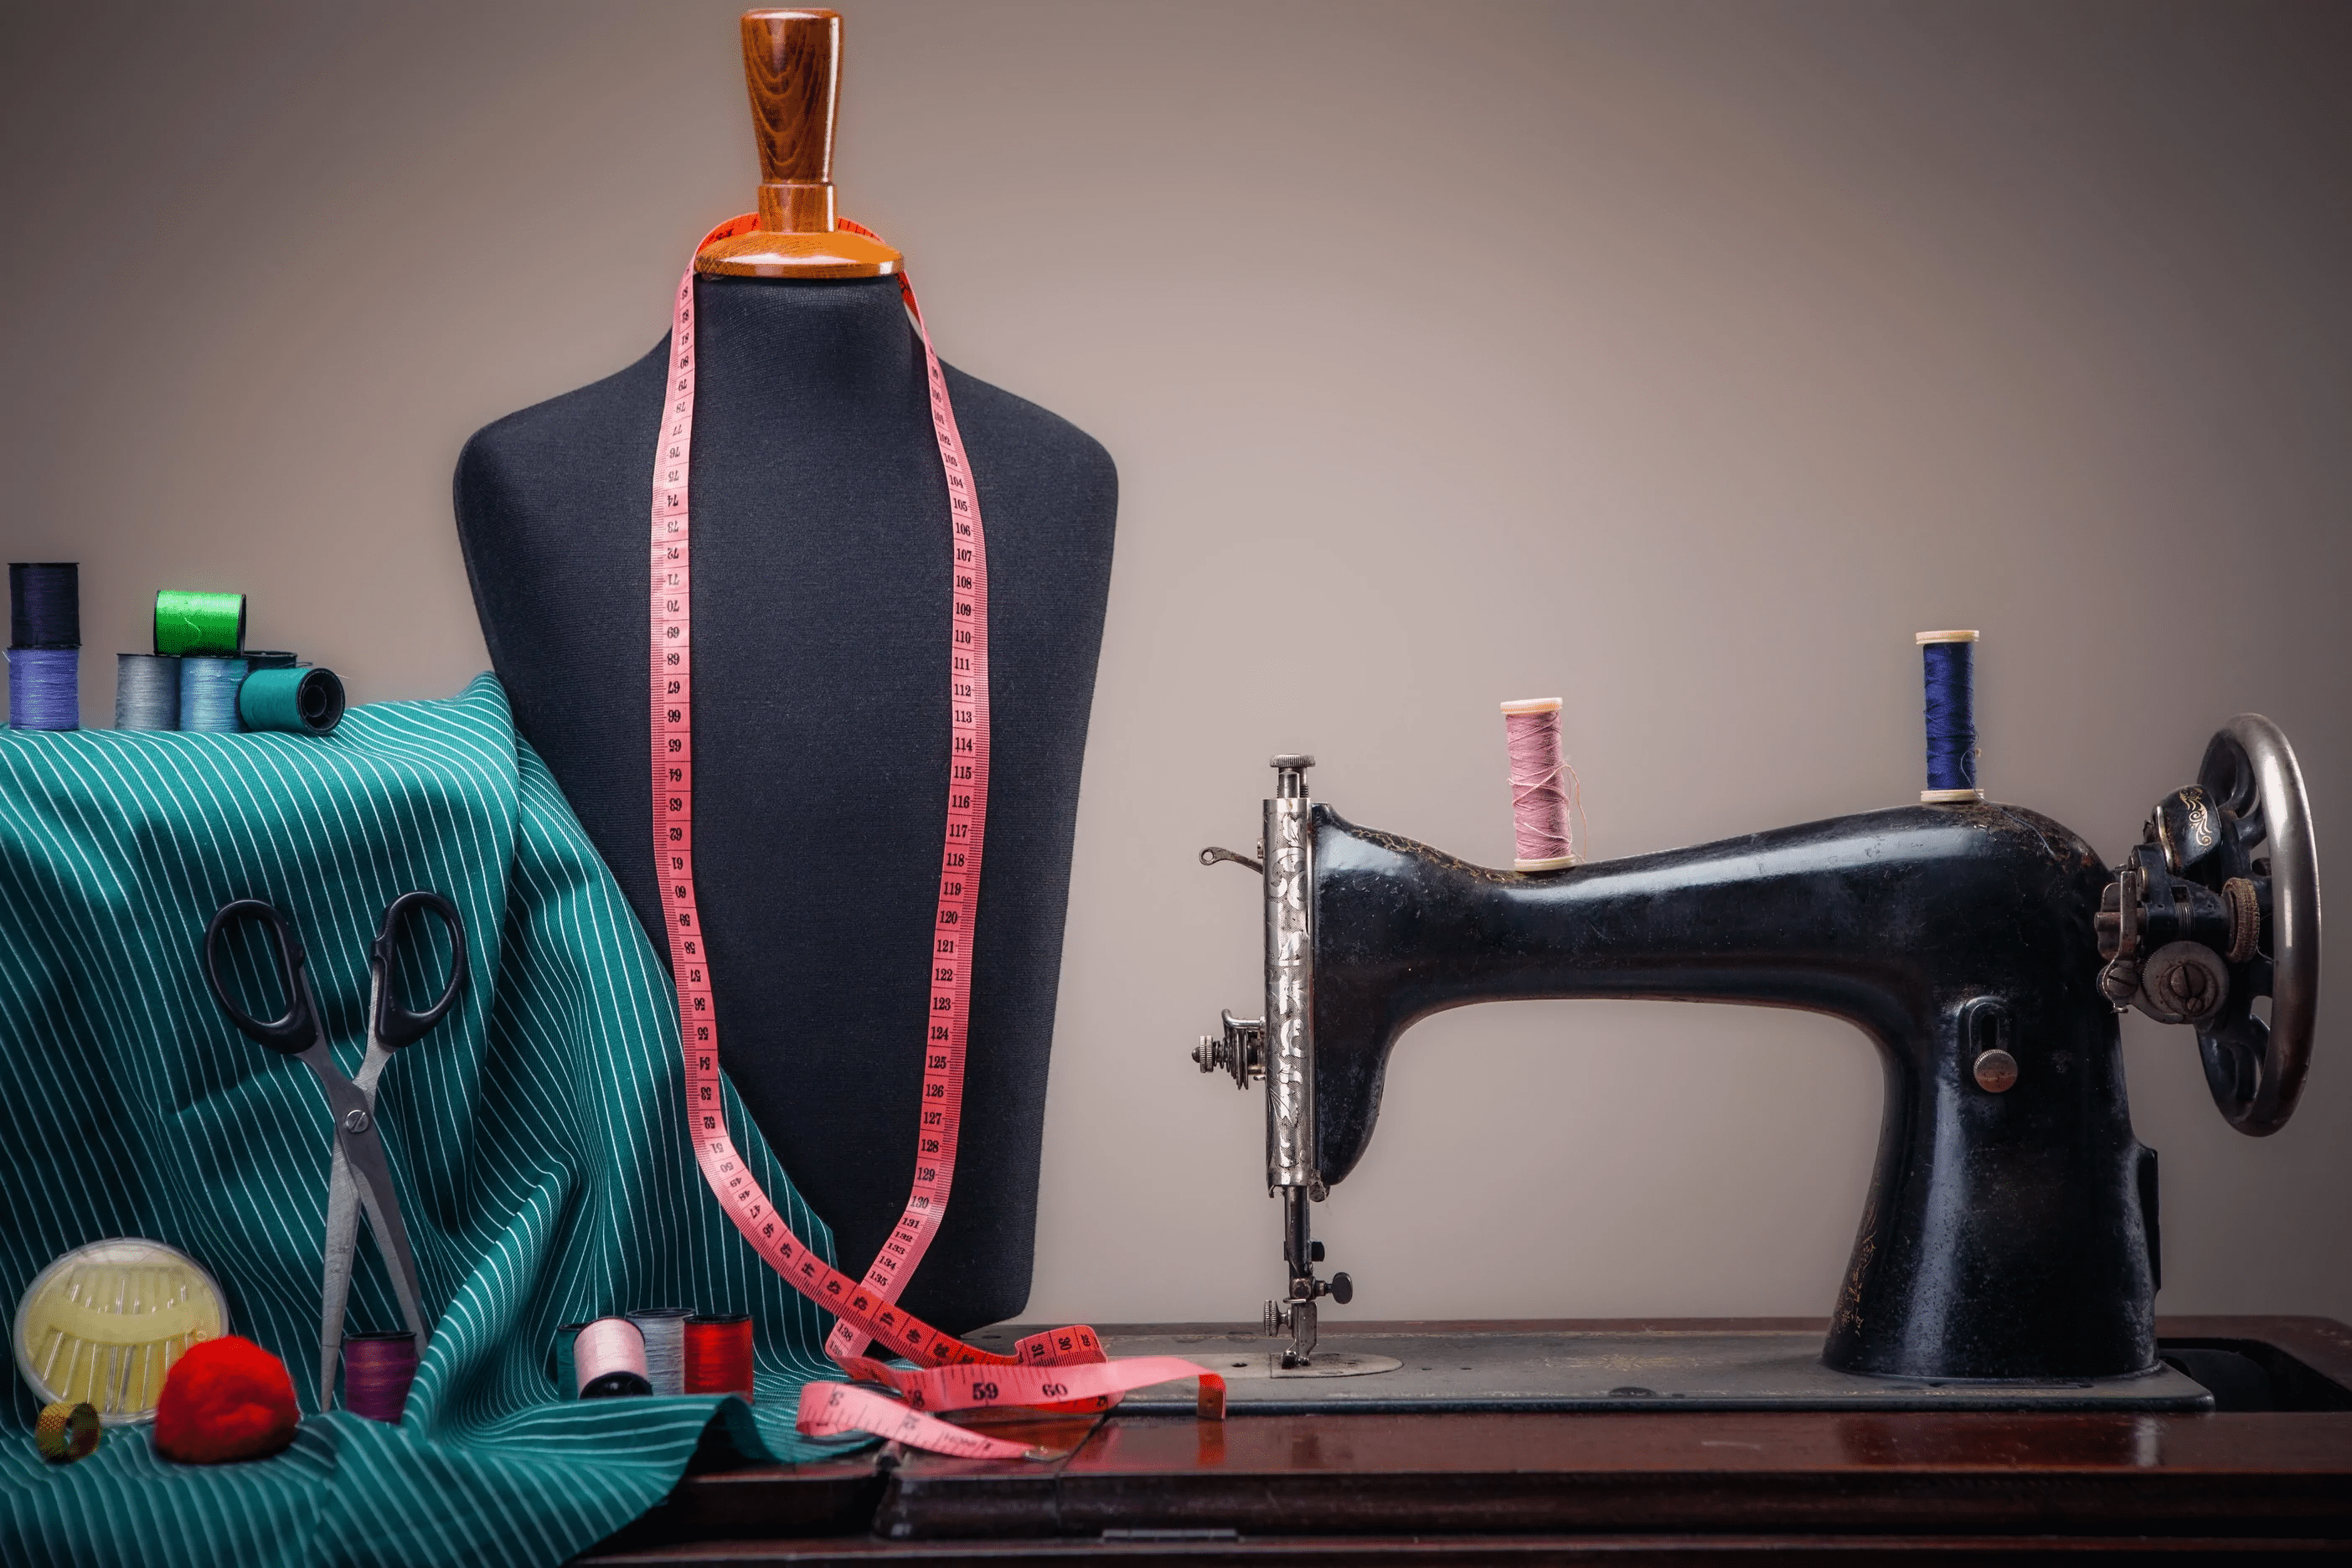
Selecting materials for your doll clothes is not difficult at all. All things you need to remember is to pick lightweight fabric pieces to avoid forming a bulk on Barbie clothes. What is more, as a doll is small enough, you do not need many materials, so fabric scraps can be very convenient for you, but at the same time, you need to work according to project patterns.
A Series of experiments have shown, that knitted materials will create more volume on dresses, and it can be more complicated to work on tiny projects like these ones. On the other hand, if you have a stitch line, it allows you to make a sleeve attachment easier, so why not take some light woven materials to add a stretch for your sleeve and bodice?
What is more, using Velcro closure or tiny buttons will be another good idea for making doll clothes. If you are using a sewing machine, you can use a Microtex needle and a stitch length of 2 millimeters.
The seam allowance can be finished using a zig-zag stitch, but it is rather an option. Also, you can sew by hand, if it is convenient for you, or you just have no other possibilities.
Next, you might understand that when you are sewing tiny-sized products, their seam allowance must be small, and have the same size too. Then you can use a seam allowance that width is no more than 4 millimeters.
You should remember, that you can always trim off an odd seam allowance in your patterns after you have sewn the seams.
If you have ever sewn tiny dresses or a skirt for Barbie dolls, you could take a look at such a thing, that your sewing machine always has a purpose to eat up your fabric when you begin sewing your seams.
To get away with this kind of problem, we can recommend you start sewing several millimeters inside of the fabric, not from its end side.
You should remember that we told you at the beginning of this tutorial about volume minimization, so it is allowed to trim your seam allowance after you have sewn all the seams and made a top stitch for every one of them. This method is widely used to make your fabric remain flat and still, even if it resists you.
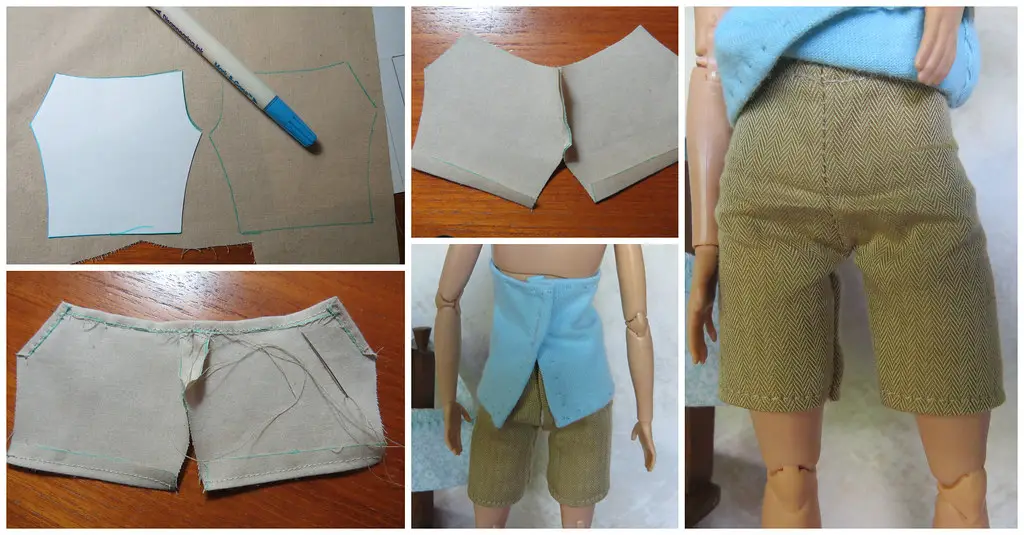
How to sew shorts for your Barbie
Shorts are one of the most popular clothes in toy dolls’ wardrobes. They are extremely popular with girls of all ages and tastes who play with Barbies. This template we want to introduce you now consists of a small waistband and two real pockets! Using our template you can make your shorts any style you want: vintage, casual, or even grunge – all you need to do is just select fabrics of certain styles you want.
For this project, it would be good to pick cotton fabrics with some prints you like, and white fabrics to use for your pockets. Before you start working, it is recommended to have your materials ironed.
Step 1. Taking cloth
Lay your main fabrics in that way good side is facing up, after that bend it over – good side to the good side.
Step 2. Place the patterns
Place your waistband on the bend you made before, and use a pin to have it secured. At the bottom of your materials place down patterns of the main part of the shorts, and you need to pin them too. Pocket panels must be placed something between your waistband and main parts.
After that, patterns of your pockets must be placed on the cloth you prepared exactly for making the pockets.
If you placed everything right, you need to cut everything down and remove the pins. Make some small notches over your fabrics. Match up notches that are outside and in the middle of the cloth.
Step 3. Sew the legs
With your nail make a crease on the fabrics. Next, match the center cut with the center line on your pattern and put on a small mark, using a pencil, at the point on the triangle. Draw a line from the outer cut right to the bottom.
Set machinery settings on straight stitching on the line drawn to make a dart in the fabrics. Put away pencil marks.
Repeat the same action for another leg of your Barbie shorts, and then cut off the strings left.
Make zig-zag stitches on both pieces from a tiny cut you made in the middle to the top. It will help you to prevent fraying. After your legs are ready – set them aside.
Step 4. Inside pockets
Lay down pocket patterns on legs with matching edges. Sew a straight line to get an even curve. After, flip the fabrics over the edge and iron them. Flip it again and sew straight stitching along the top side edge.
Take pocket panels, and put one behind the edge. Flip it over to line up with the edge of the pocket lining. Grab lining at its back and pin them. Have straight lines sewn along the edge? This is how the inside of our pockets are created.
Step 5. Sewing together
Go back and create zig-zig stitching. Complete a front panel and repeat it for both legs, lay them down, and make a straight line. Small cuts over the top release the tension. Iron the seam you have inside.
Put back panels of your legs over the front side, and use pins to hold them. Make a straight line along the edge. It will attach back panels and close the back side of your pockets. Repeat it for the other side and make zig-zag stitches along your edges to keep them from frying. Now you have the whole big fabrics piece.
Have a hem at the bottom side of the shorts.
Step 6. Shorts finishing
Pin the waistband along the top. Use straight stitching to sew along the top edge. Roll up your waistband. Flip over to make the good side face down. Bend over the top edge and iron it.
After that, flip it over again to the good side facing up, waistband must be rolled up in half, so it goes past the seam just a bit. Sew a straight line lengthwise the edge – repeat on other ends.
Then roll it, line up inside the legs, and make a straight line across. Finish it with zig-zag stitches. Flip it good side out, stitch on a hook and eye – your shorts are ready.
Sew a skirt for your Barbie doll
It will be easy to work on the doll skirt if you do not roll it into a tubular shape before it is ready. By the way, the most popular skirts for Barbies are performed in vintage style: they look really stylish and cute nowadays, and it may bring lots of fun to your child to have her doll dressed in that clothes.
The first step you need to do is close the darts of the skirt, in case you have some. Next, sew along all seams located vertically – a c-shaped backstitch is an exception. After that, press the button to sew the hem allowance of your skirt.
You can also check a relevant article – the ways to sew on a button with 2 holes.
Patterns of the skirt may be a bit slightly overlapped at the area of the c-shaped backstitch top, right there your skirt will be opened. Also, you can have stitched in that area, as the piece will be folded twice on itself.

Have your back seams opened by the moment you attach your skirt to the bodice, right that time you are making a dress?
In case you are producing patterns of a single skirt, that is not a dress, you can secure it using a waistband.
First, you need to sew the right sides of the waistband edges together. Match the center of the waistband with the c-front.
4 millimeters of the seam allowance at the end of your shorts could be left, you must close it in the following step.
After that, you can trim an excess seam allowance and push in half the waistband. Optionally, you can put the Velcro on glue in your patterns, just in case you want to shut the entire, or on the waist, you can put one tiny snap. In the end, you need to shut the c-back seams.
The strapless bodice for Barbie clothes
A strapless dress is supposed to be one of the easiest patterns to perform part of the top outfit of all Barbie clothes. Also, it is easy to do it, as there you will find sleeves or other difficult-to-make elements. Hope, that your child will like that patterns too, as in this part of our tutorial we are going to discuss them.
Step 1. Separating fabrics into 2 pieces
Snip both pieces of your bodice in the main fabric and lining fabric. This separation will allow you to have neat and nice finishings on your edges.
Step 2. Sewing the pieces
After that, you need to sew the layers of your fabric apart one from another. Press fabric pieces after cutting them off. If it is necessary, you can use a topstitch in that pattern.
Step 3. Making a stitch
Next, pin together the fabric with its right sides and make a stitch along the whole piece. You need to leave open only one c-back open. Cut it and turn outside that right side.
Step 4. Using a hand stitching
Return the seam allowance to its previous level and turn it out that one opened side left, use hand stitching in a way closing the hole. In the end, a Velcro closure can be attached.

So that is how we have made it!
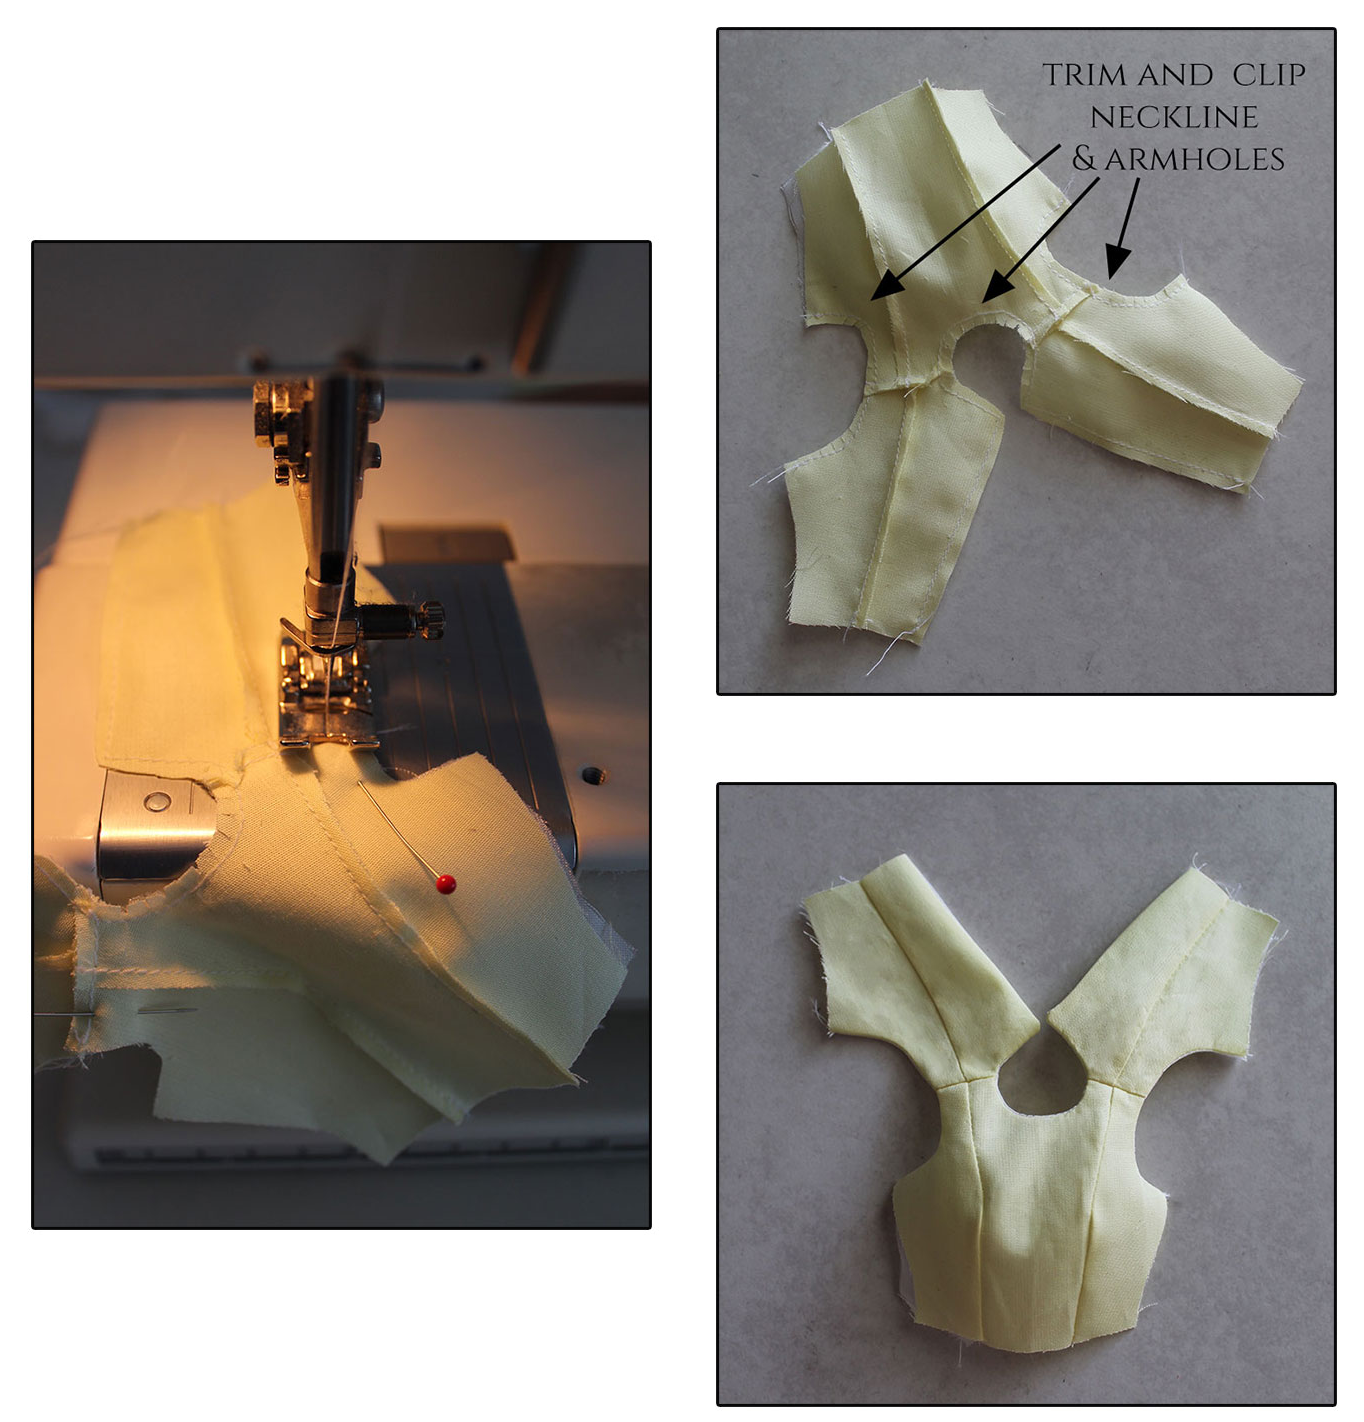
Small bodice with small sleeves
In the previous paragraph, we have described how to make a bodice with no sleeves, here we will talk about creating one even with tiny sleeves.
To finish the neckline of your bodice, you can use a facing. The lining layer can give you neat edges for the neckline and sleeve.
Step 1. Closing the shoulders and darts
The first step to do is using your two pieces of fabrics, you need to close the shoulders and darts of the Barbie clothes you sew.
Step 2. Pinning fabrics layers
Pin both of your layers from one side to another along the neckline with the right sides together. Of course, you need to remember to make the neckline symmetrical.
Step 3. Trimming off excess materials
Get rid of all odd stitches and seams on the corners. Turn out the lining up to the wrong side.
After that, you need to press on it and take a look at your cute bodice with sleeves for your Barbies.
Side seams should not have been attached until you have attached your sleeves to Barbie clothes, as it may harm the patterns. Because it may be rather complicated to sew when your bodice does not lay on a flat surface. During sewing, your sleeves should not be closed as well.
In case your sleeves have no gatherings of hemming, you can just attach them right to the armholes on your Barbie dress or bodice – match the shoulders and notches on it. Leave the lining layer out.
However, you might find it easier to sew on top with the bodice side, so this is directly opposite to what you need to do with clothes for people. But it may take your time to attach sleeves of small size using your sewing machine, as it is even easier to sew them by hand.
As you have done it before, you need to trim off all the odd threads and seam allowance, only after that you can shut and hide all the seams you have.
The seam on the lining part of the fabric must have been sewn separately to have it hidden from people’s vision.
Lined bodice & other doll clothes with no sleeves
A cute dress for your Barbie without any sleeves is always a good option if you have no certain patterns or it is just that you have searched for.
Right after that, you have sewn the neckline of dolls’ clothes, and sew the armholes in exactly the same way as you did before. Then, before turning the right side out, you ought to have some clips made.
Only at this step, you can have the side seams closed and the top finished.
Sewing airy sleeves for doll clothes
If you want to make your patterns of Barbie clothes at an extra cute level, it is a sign you need to make balloons or some type of puff sleeves. To be honest, this action of fun pattern-making will be entertaining not only for adults but for children too.
On the other hand, you will be forced to go through some extra steps in your pattern during sewing clothes for your dolls.
There you will be able to have gathered seams, which you sew to the cap of your sleeve. Zig-zag stitches will help you to finish the seam allowance, but you need to do it right after the cuff was attached, as it can be damaged when you have your Barbie doll dressed.
Next, all you need to do is just fold it in a half and then sew.
If you have chosen this option, you need to have the cap of your sleeve gathered enough to have armholes matched among the grooves you have.
To not lose the central groove when you sew your patterns, you need to pin your sleeves at the shoulders line first. And then have one of the sides gathered to match it to the armhole.
Petite bodice patterns and their facing
On my site you will find a big amount of tutorials that will tell you about opting for a facing, in case you are interested in having the neckline of your child dolls Barbie clothes finished only.
However, after performing that, you can notice that pieces of the facing are really small.
So why not learn how to make an advanced bodice? We are ready to provide you with all tips you need to know.
Step 1. Have two pieces separately
You are recommended to work on any side of your fabrics singly. Next, pin the facing with the right sides together, of course, exactly in the area of the pattern neckline and stitch.
After that, you can trim off up to half of your seam allowance. To have the ability to turn it out the facing to the side is supposed to be wrong, you need to make some clips at this area.
Step 2. Sewing the seams on your shoulders
Then you should sew the seams of the shoulders. You need to make it on the facing and on the bodice, after that trim both of them.
Step 3. Finishing the tiny bodice
Before pressing the facing, you need to roll it up to the irregular side.
Finishing these petite bodices is actually very simple, all you need to do is fold and stitch your c-back. If you did everything right, that c-back covers the facing’s short rim.
At this stage, you can move to add side panels, if you have planned to do it.
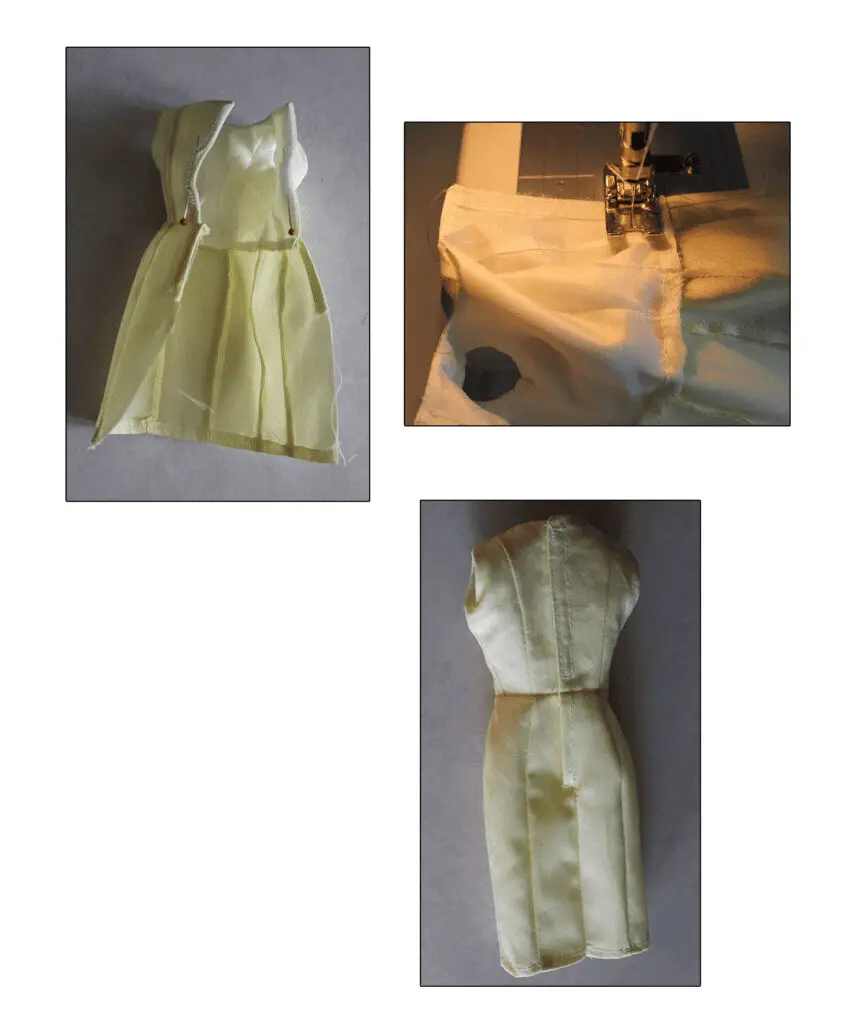
Combining bodice and skirt in your patterns
If you or your child have an idea of sewing a cute dress for your Barbie dolls with a fun pattern, we can show you a method of how to do it in the simplest way, you can ever imagine yourself. Also, you will be able to perform all of your patterns, so do not be afraid about this question.
All you need to do is attach the bodice and the skirt, matching certain seams, stitches, and necklines.
In case the waistline of your skirt was ruched, put it in that way it gathers your bodice. After that, you can start sewing that clothes element by the pattern to your Barbie doll, and right after that have the dolls dressed.
Velcro fasteners
Not everyone person has special tiny-sized snaps, as usually they are widely used in patterns for Barbie’s dolls’ jeans as well as other garments. Using a closure on Velcro might be the simplest variant for you.
You need to have cut at about 5 millimeters of your Velcro, which will lay down straight on bodice length and have touched to the c-back are sure.
For finishing patterns of your garment, you need to close the c-back seam on your skirt or jeans.
Conclusions on how To Sew Barbie Shorts on Your Sewing Machine
In this article, we have described different methods and options for how you can produce cute and excellent outfits for your doll Barbie. In comparison with other tutorials, using services on our site you have an opportunity to take a look at pictures and patterns of producing clothes for your doll.
We are sure, that you had a great experience and fun reading and learning this tutorial, so you will be able to use all knowledge received in your following projects connected with Barbie garments or creating wonderful doll clothes patterns.
The best thing you can do for us is to share this content with your friends and relatives who also love sewing Barbie clothes. It was excellent to know how to sew barbie shorts on your sewing machine.
Best wishes!
Related Posts
How To Sew On Velcro Strips With Sewing Machine?
How To Sew A Tote Bag With A Flat Bottom?
How To Sew Tulle By Hand?
How To Sew Fishnet Fabric?
How To Sew Quilt Squares Together By Hand?
How To Sew Polyester Fabric?

How To Sew Spaghetti Straps?
How To Do A Closure Sew-In?
How To Do A Full Sew-In Weave?

One thought on “How to sew barbie shorts and other fashion clothes?”